
Crossware Email Signature retrieves user data from Azure Active Directory (Azure AD) via Microsoft’s Graph API. However, only a limited set of default Azure AD attributes are available. To include additional on-premises Active Directory (AD) attributes, those must be synced into Azure AD as extension attributes using Azure AD Connect.
Once synced, these extension attributes can be used in Crossware lookups and signature rules just like any other AD attribute.
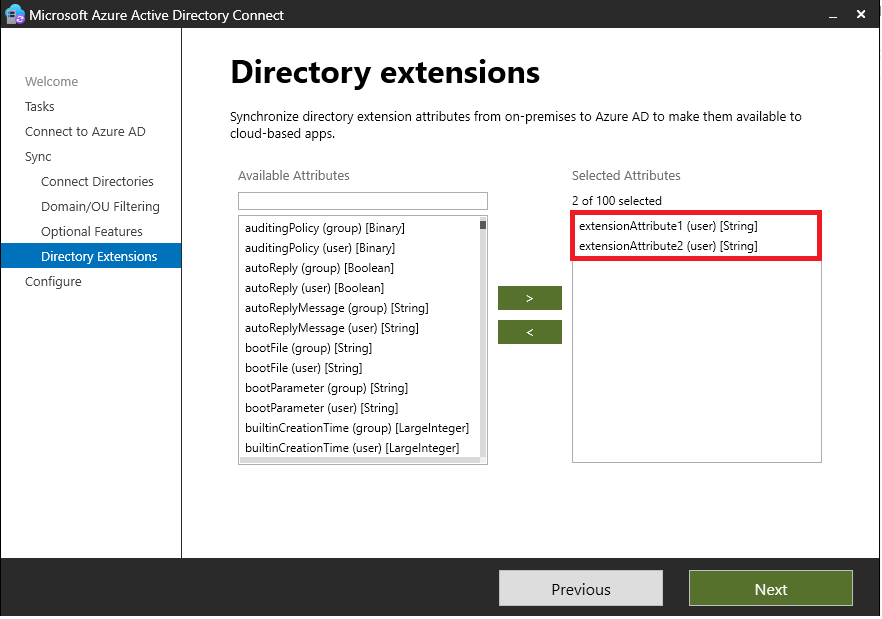
Enable Sync of Extension Attributes in Azure AD Connect
-
Open Azure AD Connect on your server.
-
Select the Directory extension attribute sync feature.

-
Pick the on-premises AD attributes you want to synchronize.
Only user attributes should be selected not group attributes.
-
Save your changes and complete the wizard.
If you need to change the selected attributes later, simply re-run AzureADConnect.exe to update the configuration.
This process uses Microsoft’s directory extensions sync feature. Crossware does not manage or control these steps.
Confirm the Synced Attributes
After syncing, Azure AD will expose the extension attributes under names like:
extension_9d98ed114c4840d298fad781915f27e4_extensionAttribute1
These names may differ per tenant, so you’ll need to confirm the exact attribute name before using it.
Populate the Attribute Values
There are two ways to fill extension attributes with values:
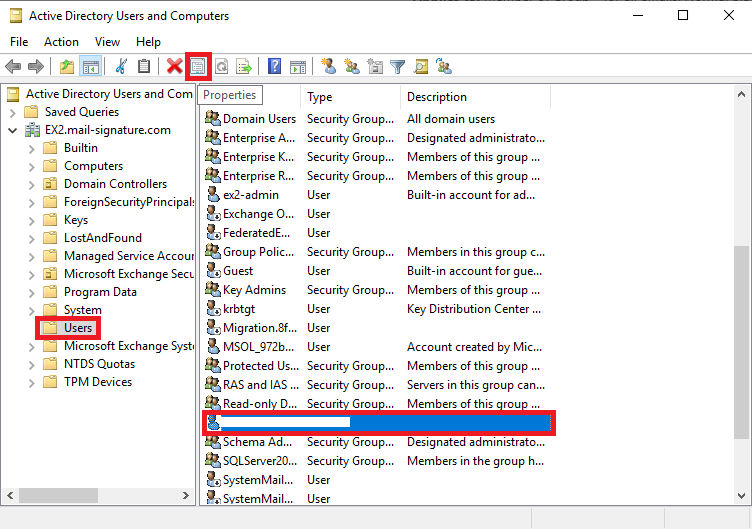
Option A — Via On-Prem AD Users
-
Open Active Directory Users and Computers.
-
Select a user and open Properties.
-
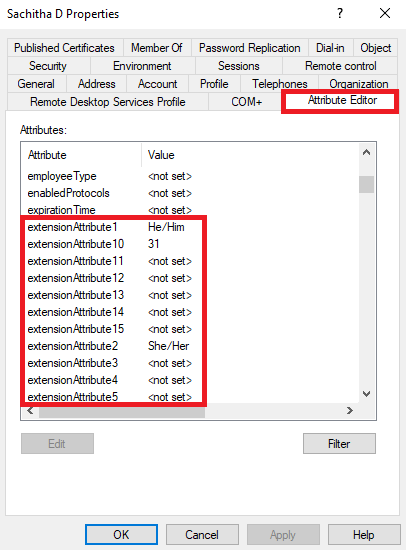
Go to the Attribute Editor tab.
-
Scroll to the extension attribute you synced (e.g.,
extensionAttribute1).
-
Enter the desired value and save.
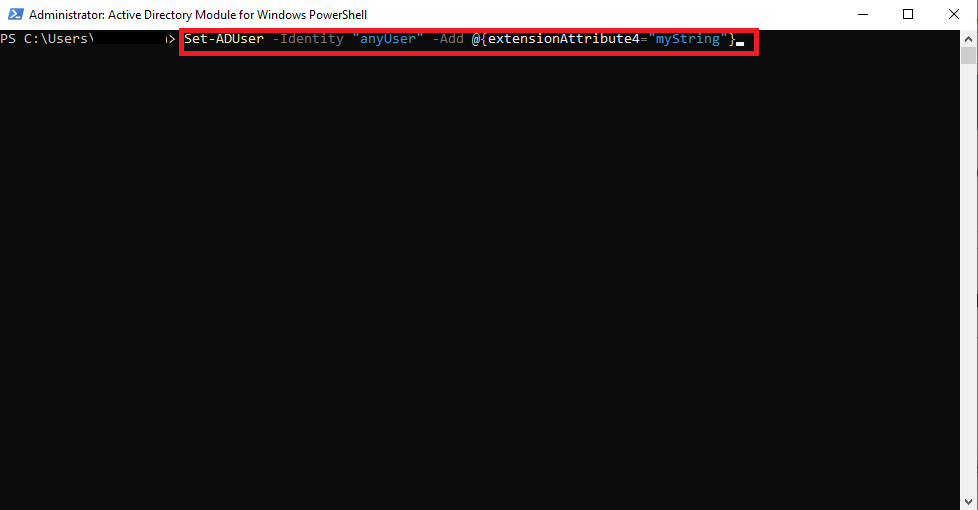
Option B — Via PowerShell
Use the Active Directory PowerShell module:
Set-ADUser -Identity "user@domain.com" -Add @{extensionAttribute1="ValueHere"}
Replace extensionAttribute1 and value as required.
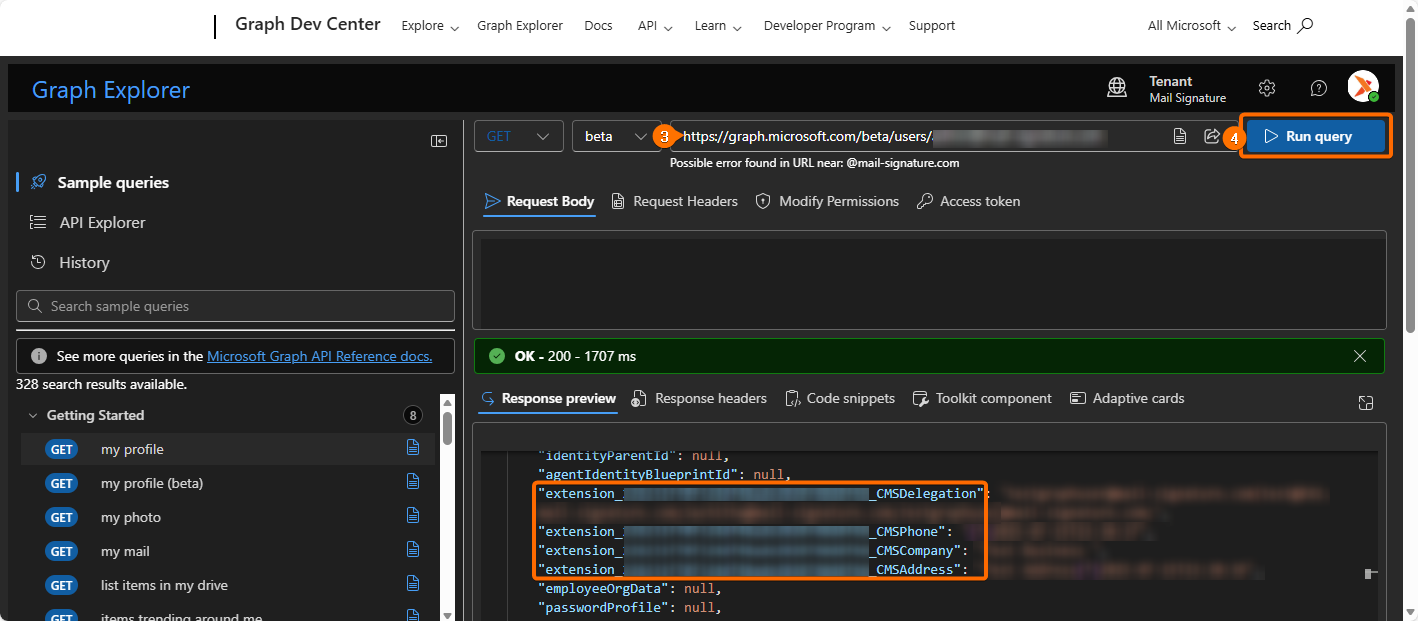
Verify the Attribute in Microsoft Graph Explorer
-
Open Graph Explorer.
-
Sign in by selecting the profile icon in the upper-right corner.
-
In the query box, enter the following request:
https://graph.microsoft.com/beta/users/{user-email}
Replace{user-email}with the user’s actual email address. -
Select Run query.
-
Confirm that the expected extension attributes are returned in the response.
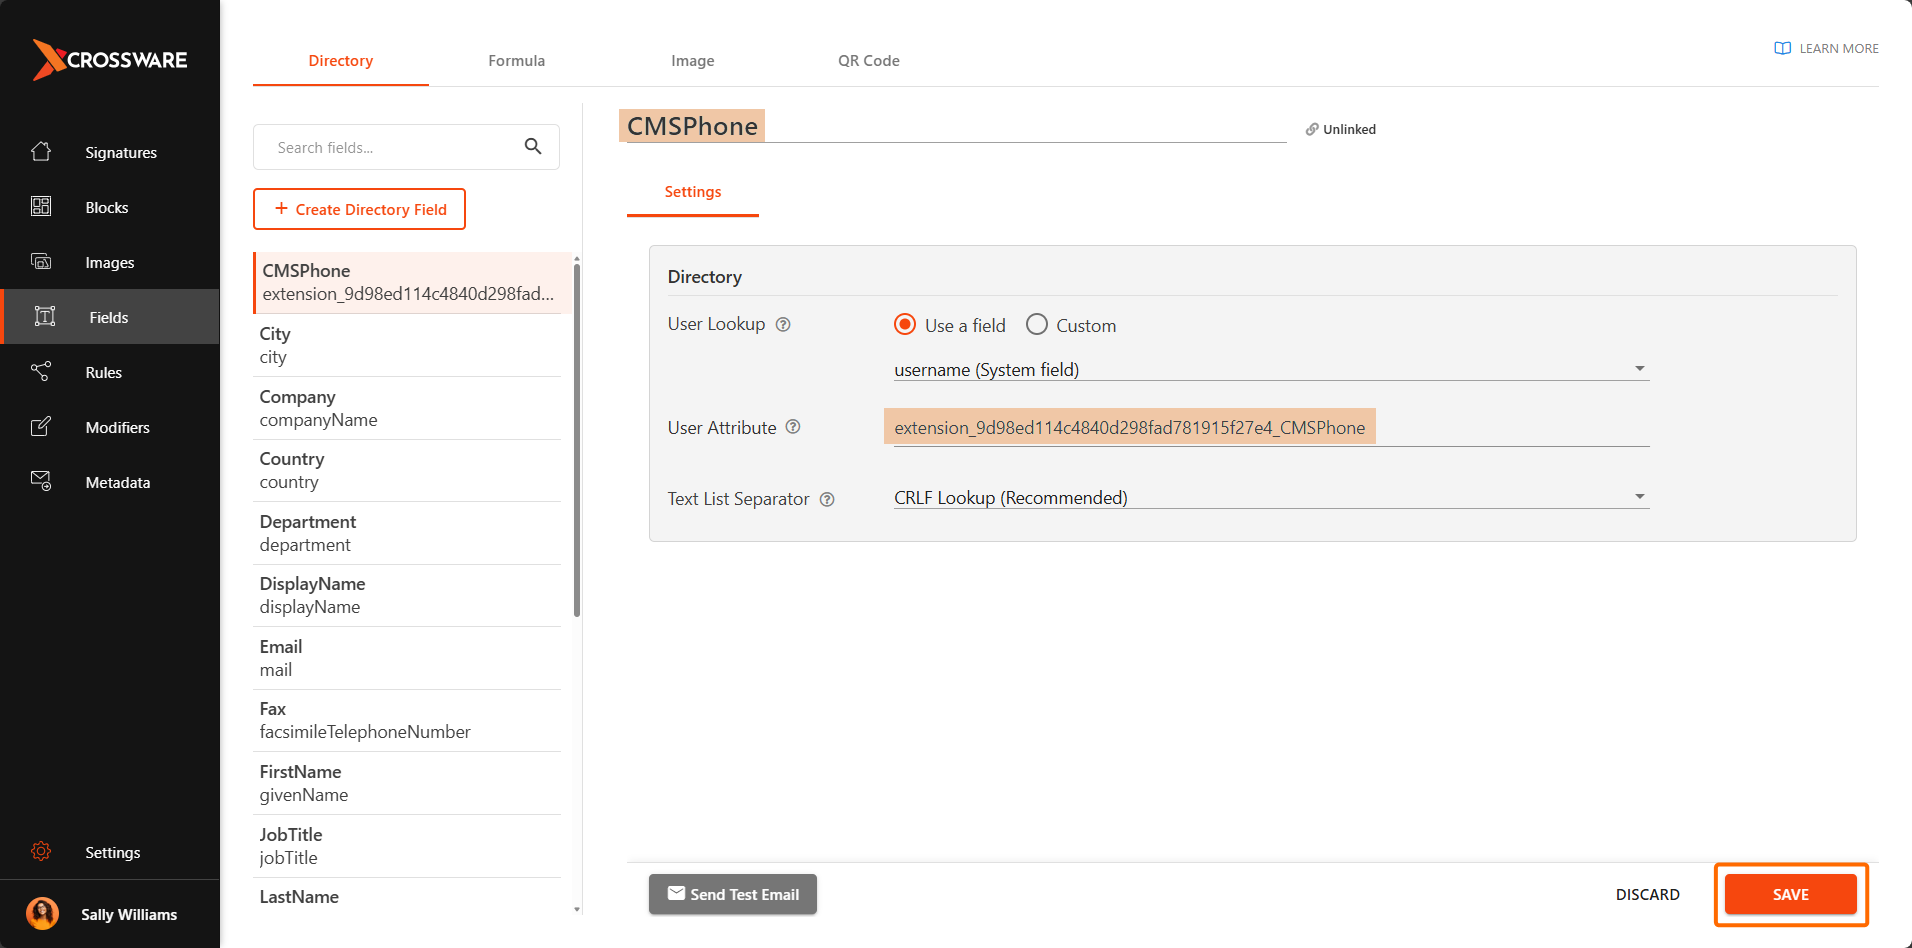
Create a Directory Field in Crossware
-
Go to the Crossware Portal.
-
Select Fields.
-
Choose Create directory field.
-
Enter a name for the directory field.
-
In the value field, enter the attribute reference in the following format:
extension_{AppId}_<onPremAttributeName>Example:
extension_9d98ed114c4840d298fad781915f27e4_CMSPhone -
Select Save & Close.
Test the Directory Field
-
Select the field you have created.
-
Select the Send Test Email icon.
-
Select Send.
-
Verify that the custom attribute values appear in the test email.
You’ve now configured On Premise extension attributes. You can use these attributes to dynamically populate fields within Crossware.