
This article explains how to configure custom extension attributes in Microsoft 365, verify them using Microsoft Graph Explorer, and use them within Crossware.
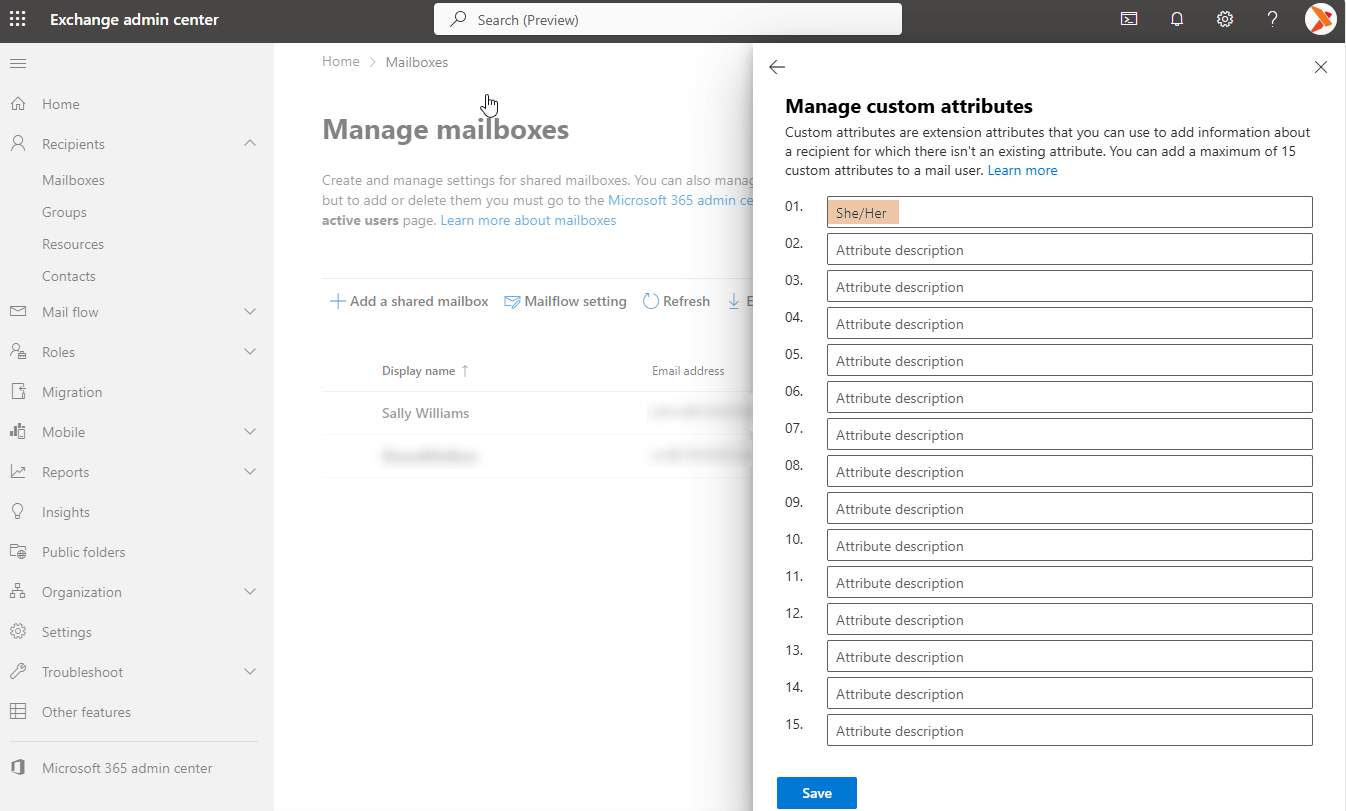
Add a Custom Attribute in Microsoft 365
-
Go to the Exchange admin center.
-
In the left navigation, select Users > Active users.
-
Select the user you want to update.
-
In the user details pane, select the Mail tab.
-
Choose Edit Exchange properties.
-
Select the Others tab.
-
Under Custom attributes, select an empty text box and enter the required value.
-
Select Save.
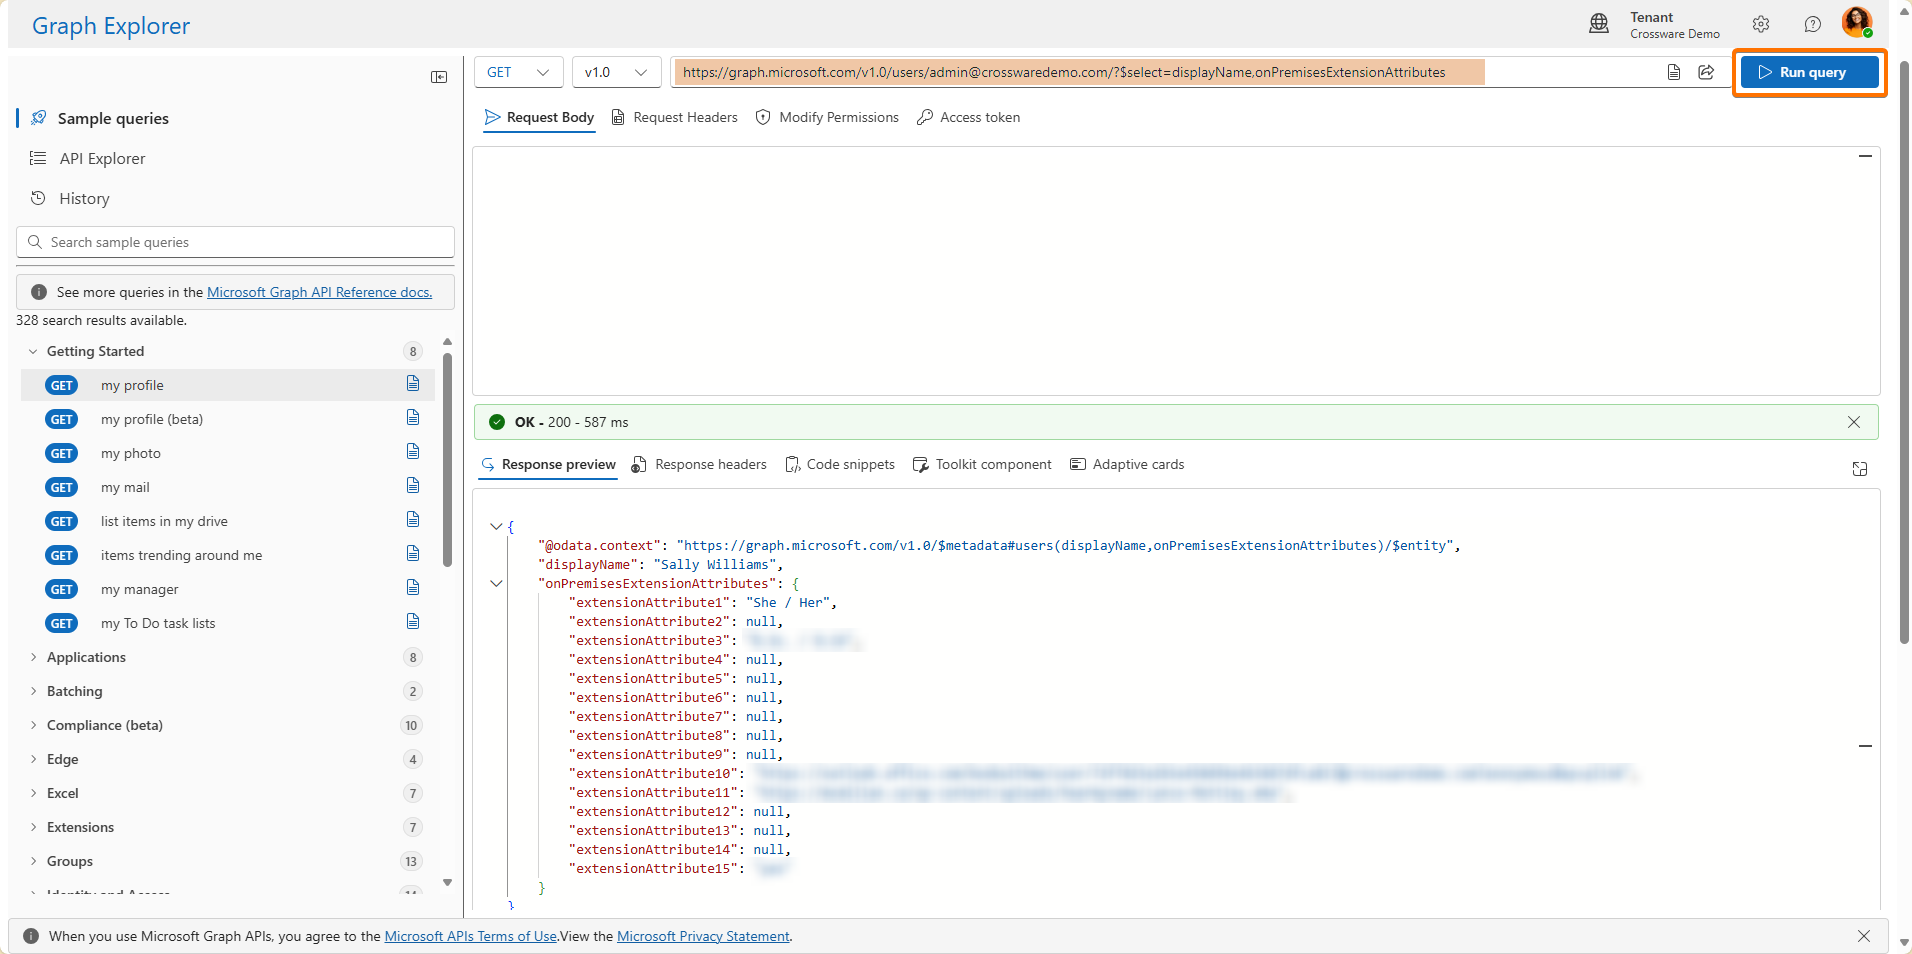
Verify the Attribute in Microsoft Graph Explorer
-
Open Graph Explorer.
-
Sign in by selecting the profile icon in the upper-right corner.
-
In the query box, enter the following request:
https://graph.microsoft.com/v1.0/users/{user-email}?$select=displayName,onPremisesExtensionAttributesReplace
{user-email}with the user’s actual email address.Example:
https://graph.microsoft.com/v1.0/users/admin@crosswaredemo.com/?$select=displayName,onPremisesExtensionAttributes -
Select Run query.
-
Confirm that the expected extension attributes are returned in the response.
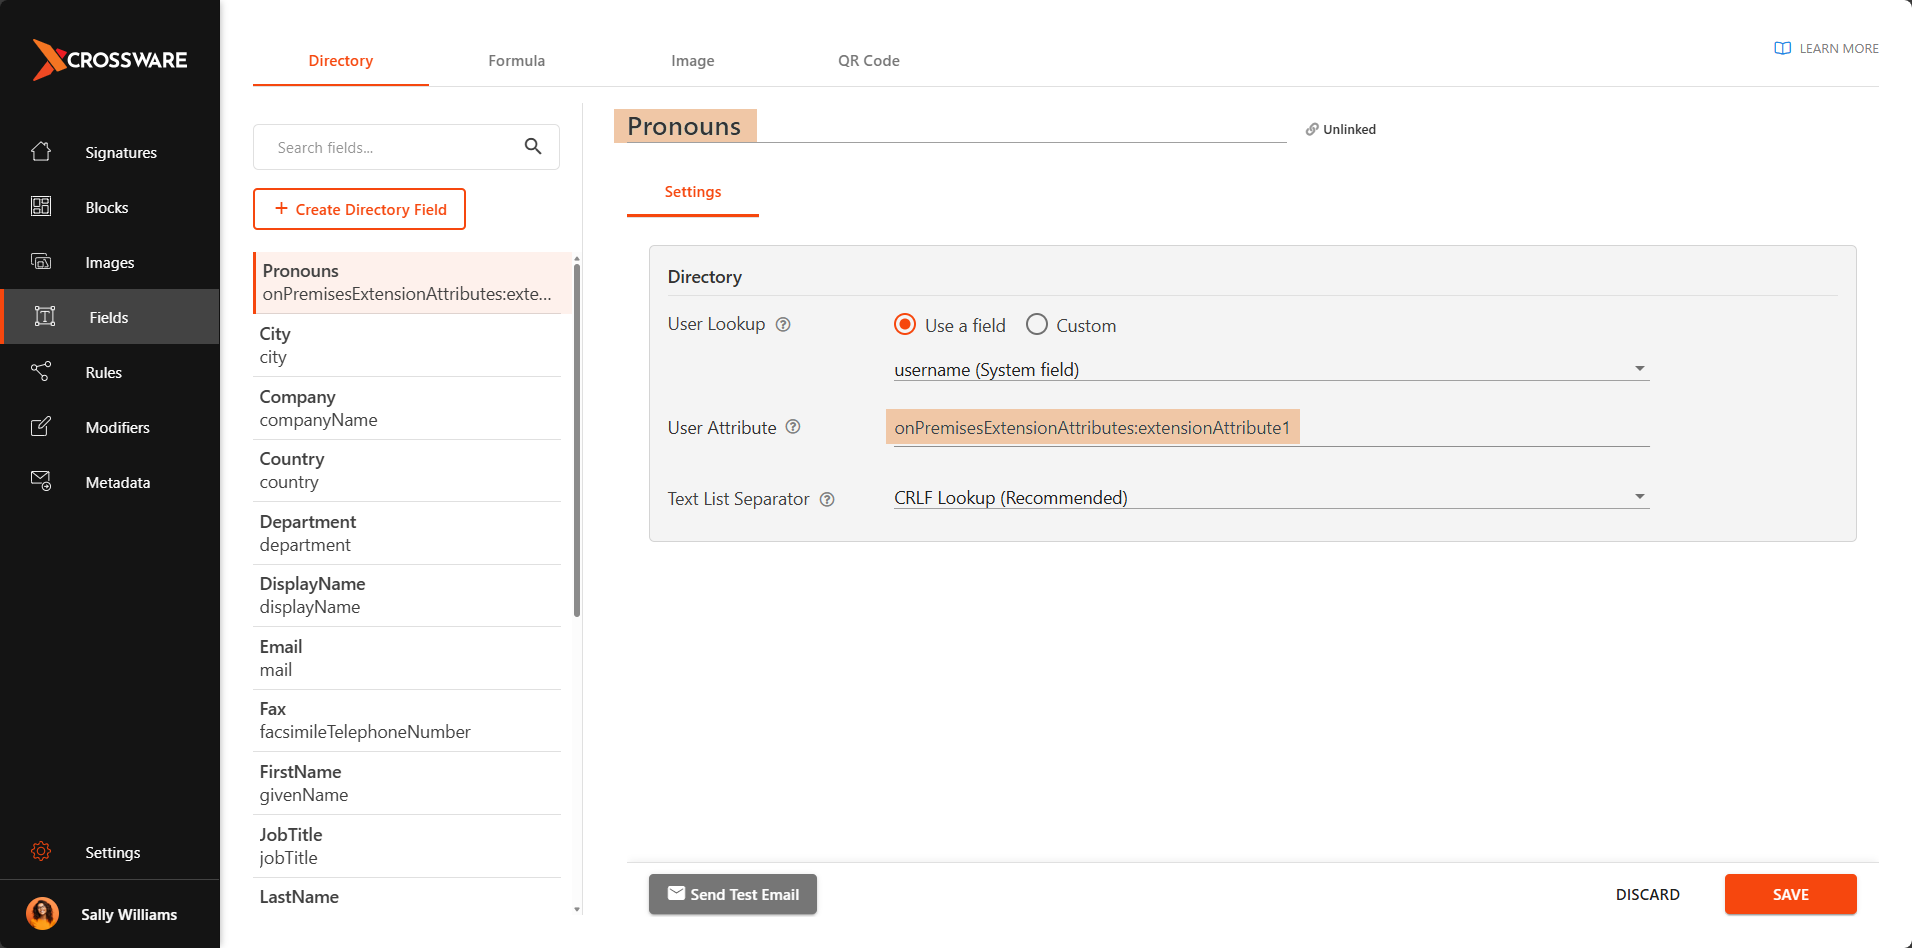
Create a Directory Field in Crossware
-
Go to the Crossware Portal.
-
Select Fields.
-
Choose Create directory field.
-
Enter a name for the directory field.
-
In the value field, enter the attribute reference in the following format:
onPremisesExtensionAttributes:{attributeName}Example:
onPremisesExtensionAttributes:extensionAttribute1 -
Select Save & Close.
Test the Directory Field
-
Select the field you have created.
-
Select the Send Test Email icon.
-
Select Send.
-
Verify that the custom attribute values appear in the test email.
You’ve now configured custom extension attributes. You can use these attributes to dynamically populate fields within Crossware.