
Rules in Crossware allow you to control when and how signatures, blocks, or content appear. They work by returning a true or false result based on conditions you define.
What Rules Can Do
-
Target by audience
-
Show one disclaimer for external recipients and another for internal emails.
-
-
Apply seasonal or campaign content
-
Automatically display a Christmas banner in December or a Valentine’s promotion during February.
-
-
Customise by department or group
-
Apply different logos, colours, or layouts depending on whether the sender is in Sales, Finance, HR, etc.
-
-
Restrict by user attributes
-
Use fields such as job title, location, or email address to decide who sees a signature.
-
-
Date and time control
-
Run a specific banner or signature only within a set date range.
-
-
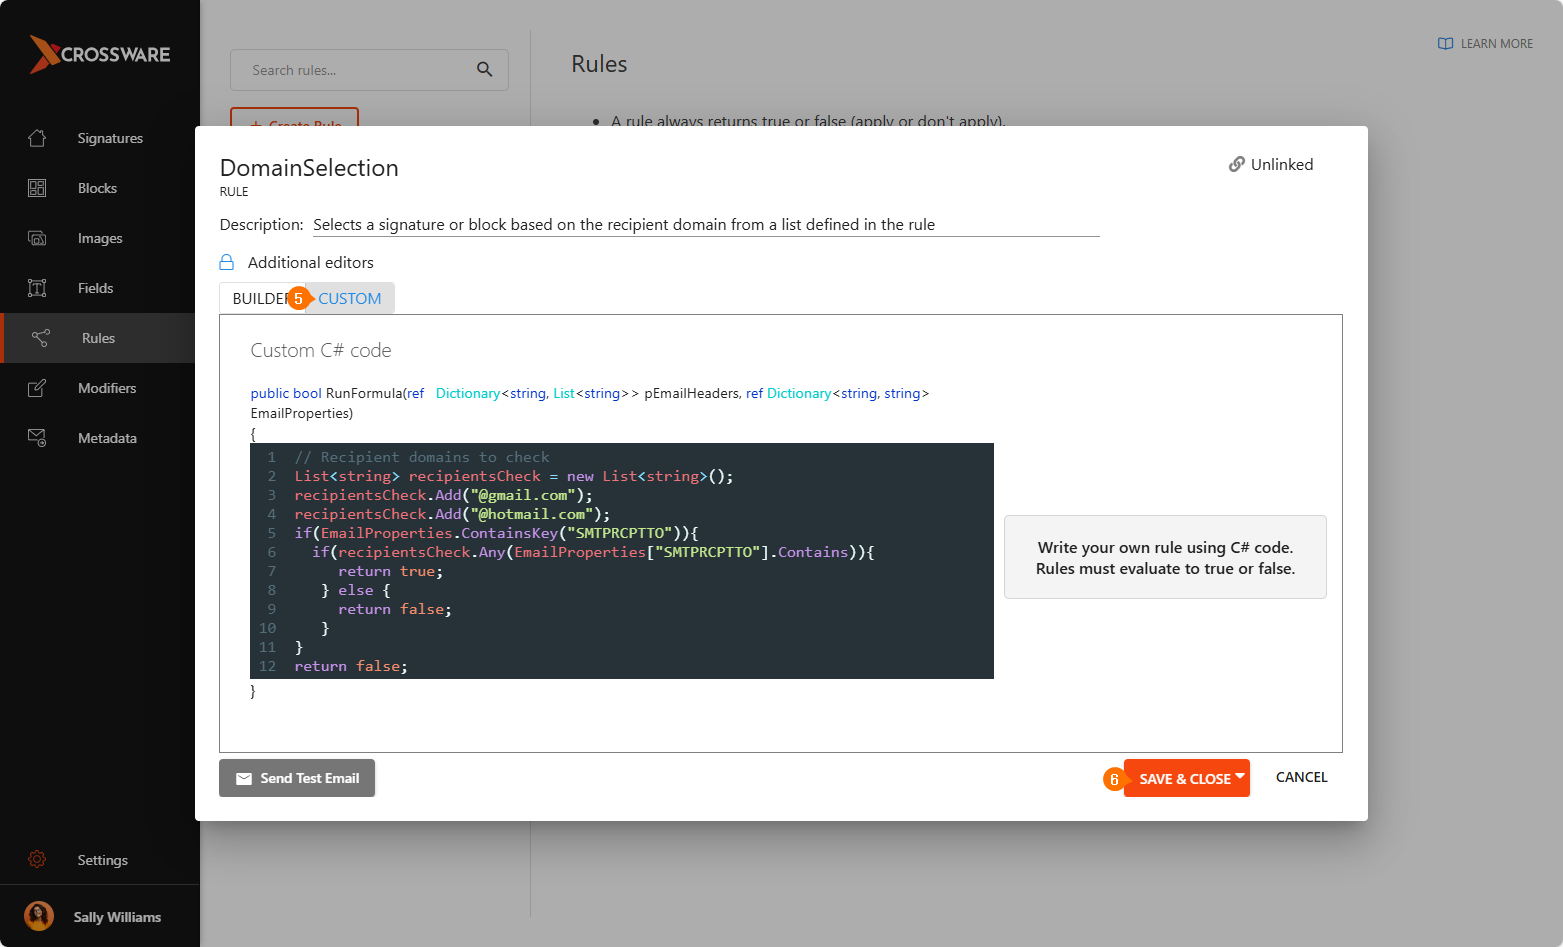
Advanced logic with scripts
-
Write custom C# scripts for more complex scenarios, giving you full flexibility.
-
Creating a Rule
-
Sign in to the Crossware Portal and navigate to the Rules section.
-
Click Create Rule.
-
Fill in the fields:
-
Rule Name – a descriptive name to identify the rule later
-
Description – optional notes.
-
-
Choose your conditions:
-
Date tab – pick a day of the week, month, or date range.
Note: Month and date range can't be used together -
Email tab – choose internal/external emails, specific senders or groups, or subject keyword
-
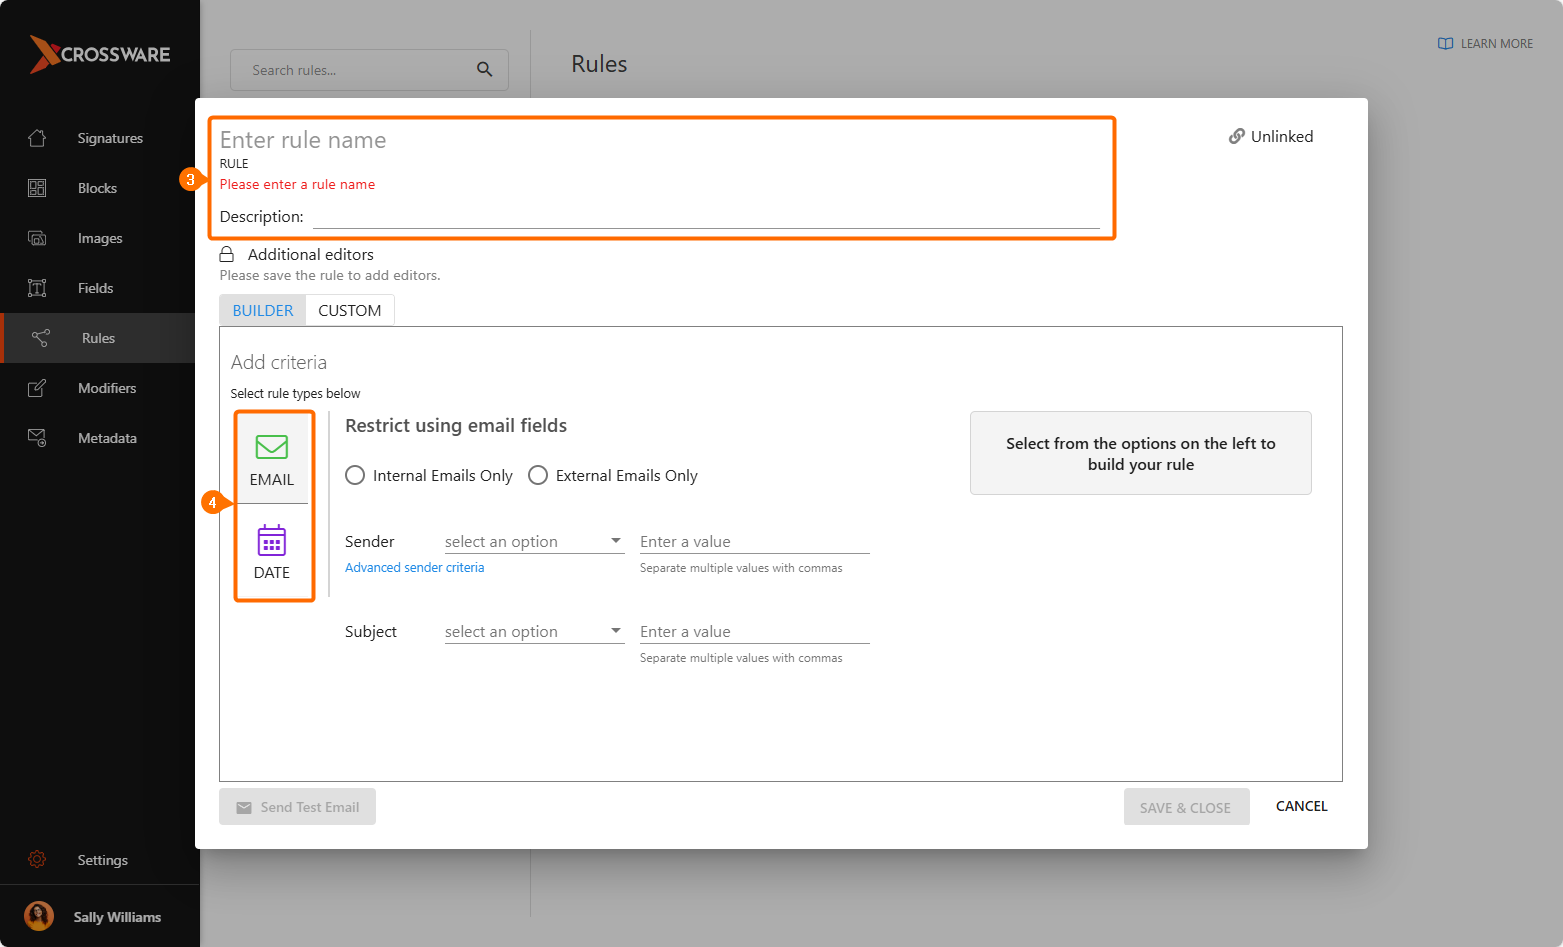
-
For more advanced scenarios, use the Custom tab to add your own C# logic.
-
Click Save & Close.
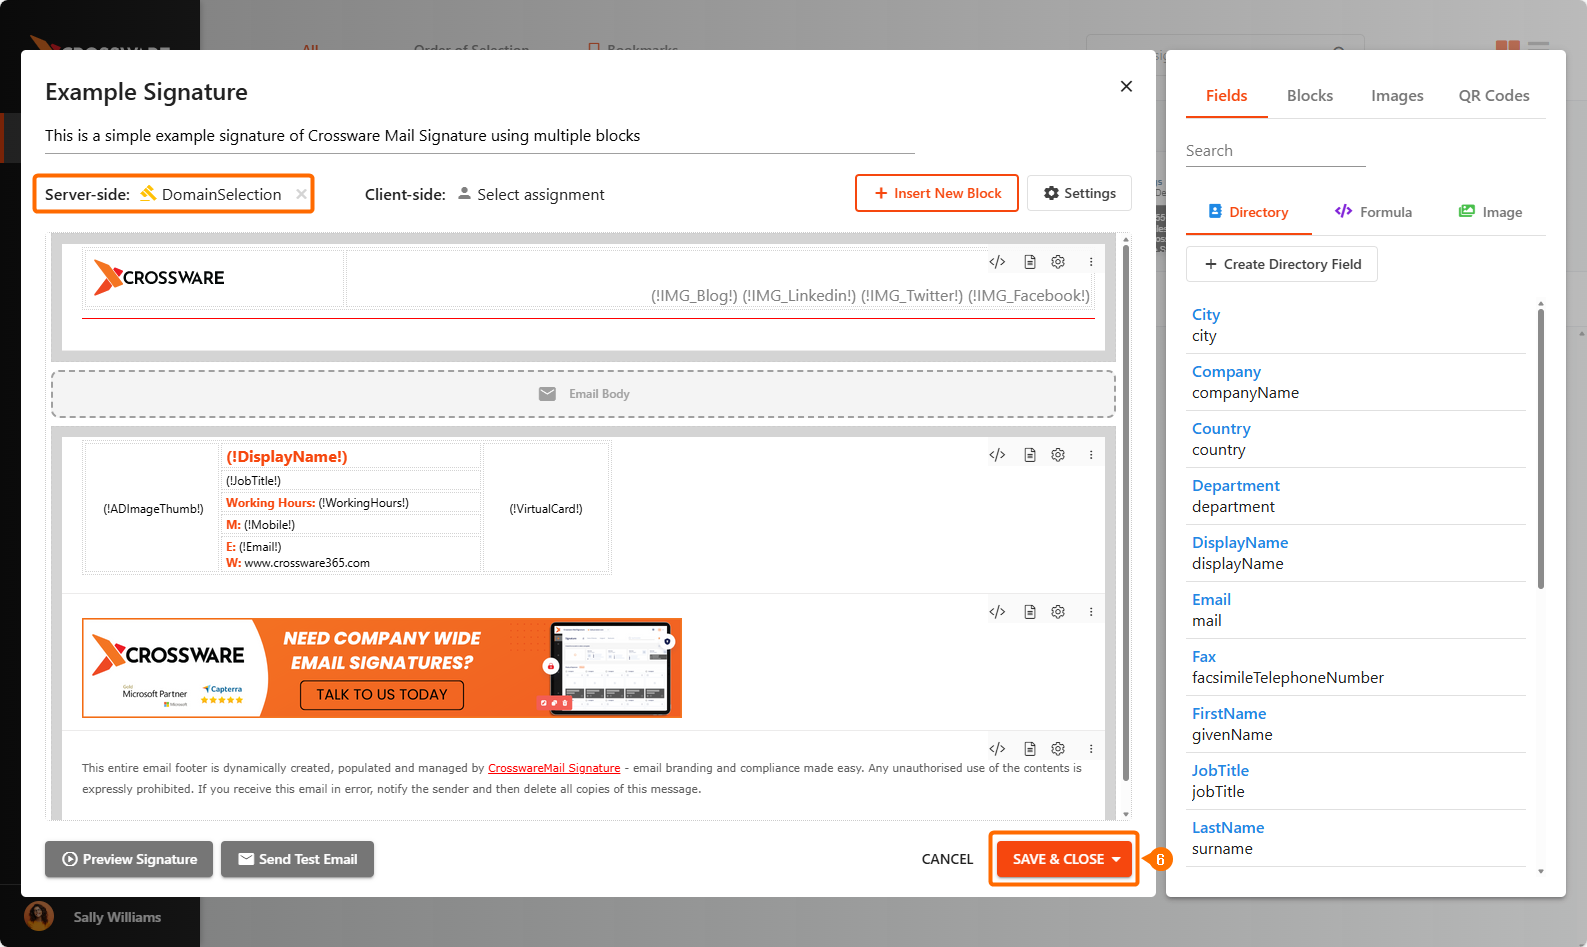
Applying Rule to a Signature
-
Go to Signatures in the Crossware Portal.
-
Select the signature you wish to use and click Edit.
-
Under the Server-side option, click Select assignment.
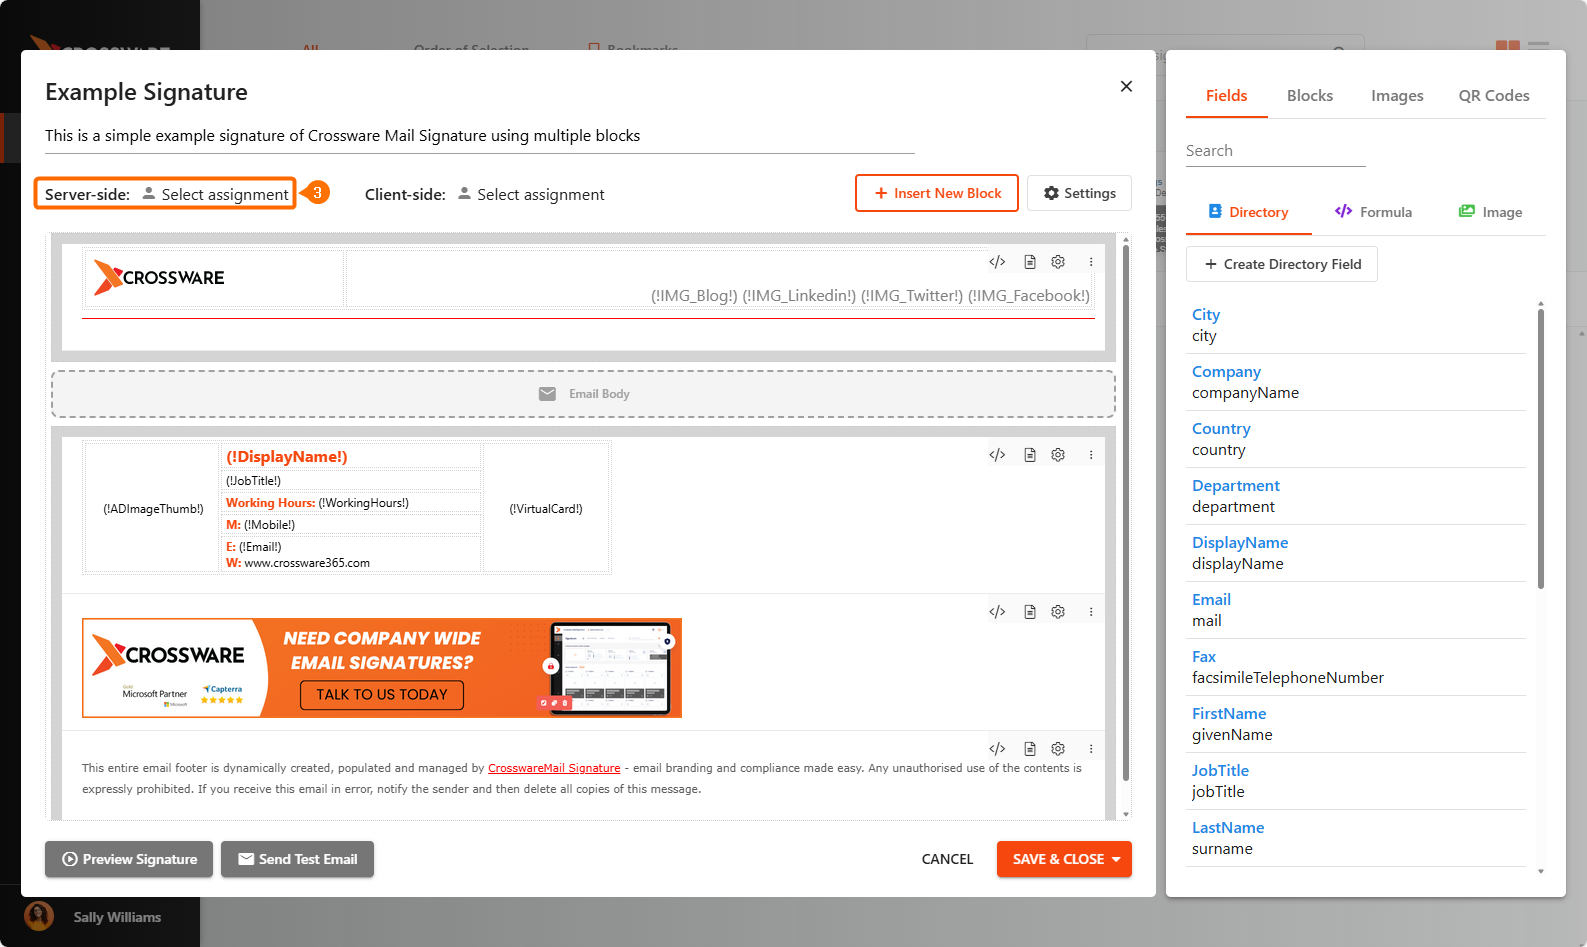
-
From the available options, choose Rules.
-
Use the drop-down menu to select the rule you previously created and click Add Rule.
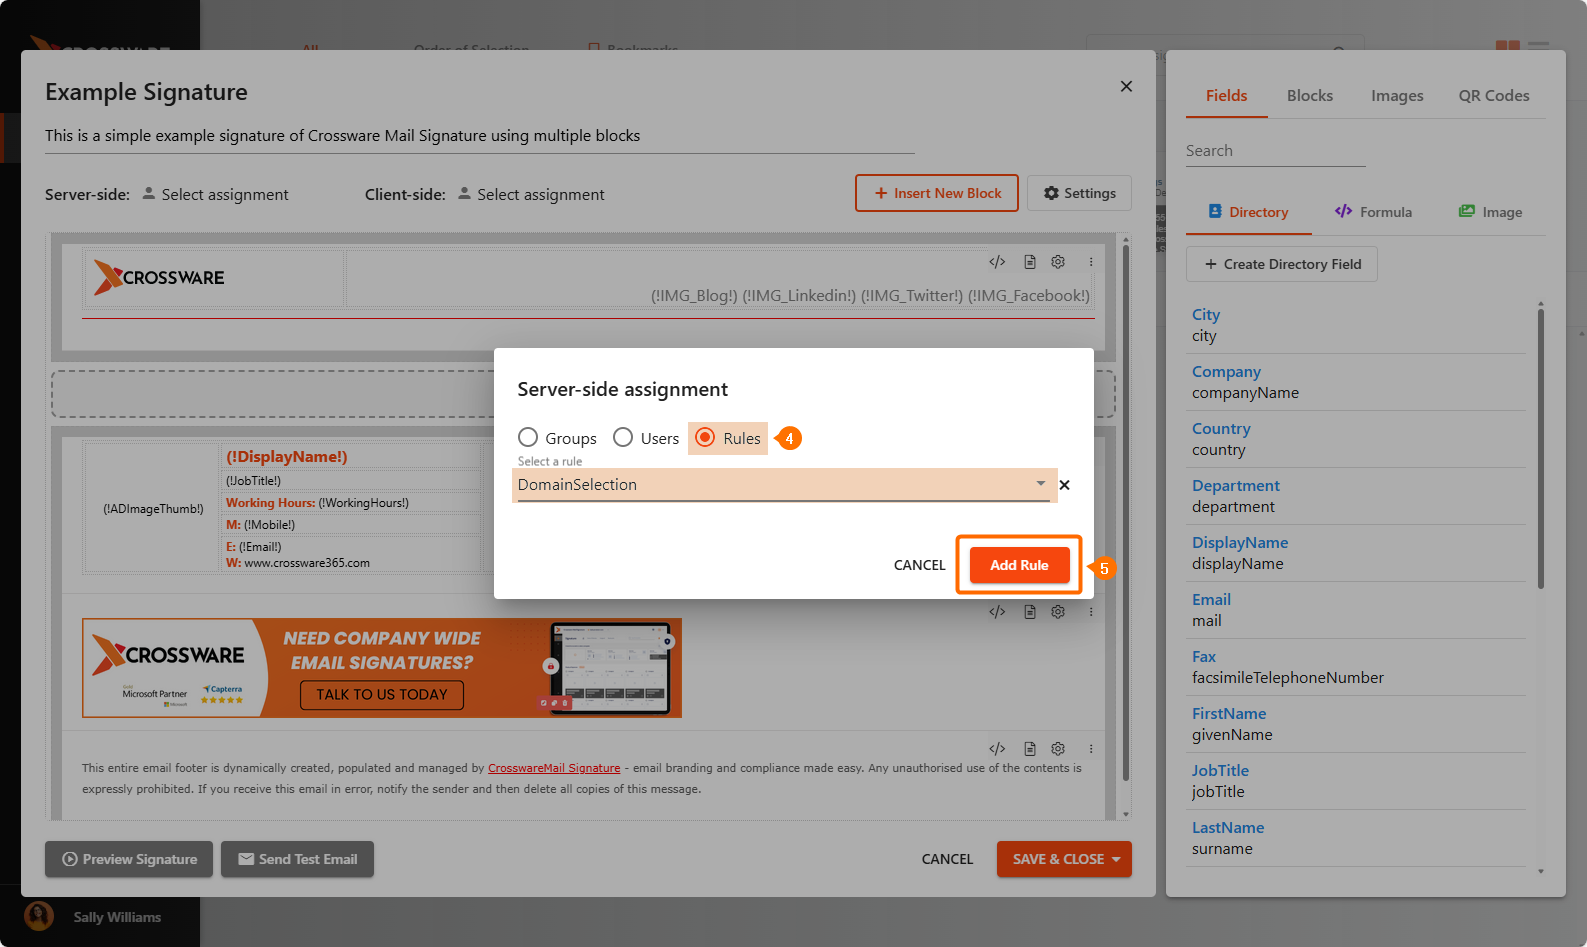
-
Click SAVE & CLOSE.
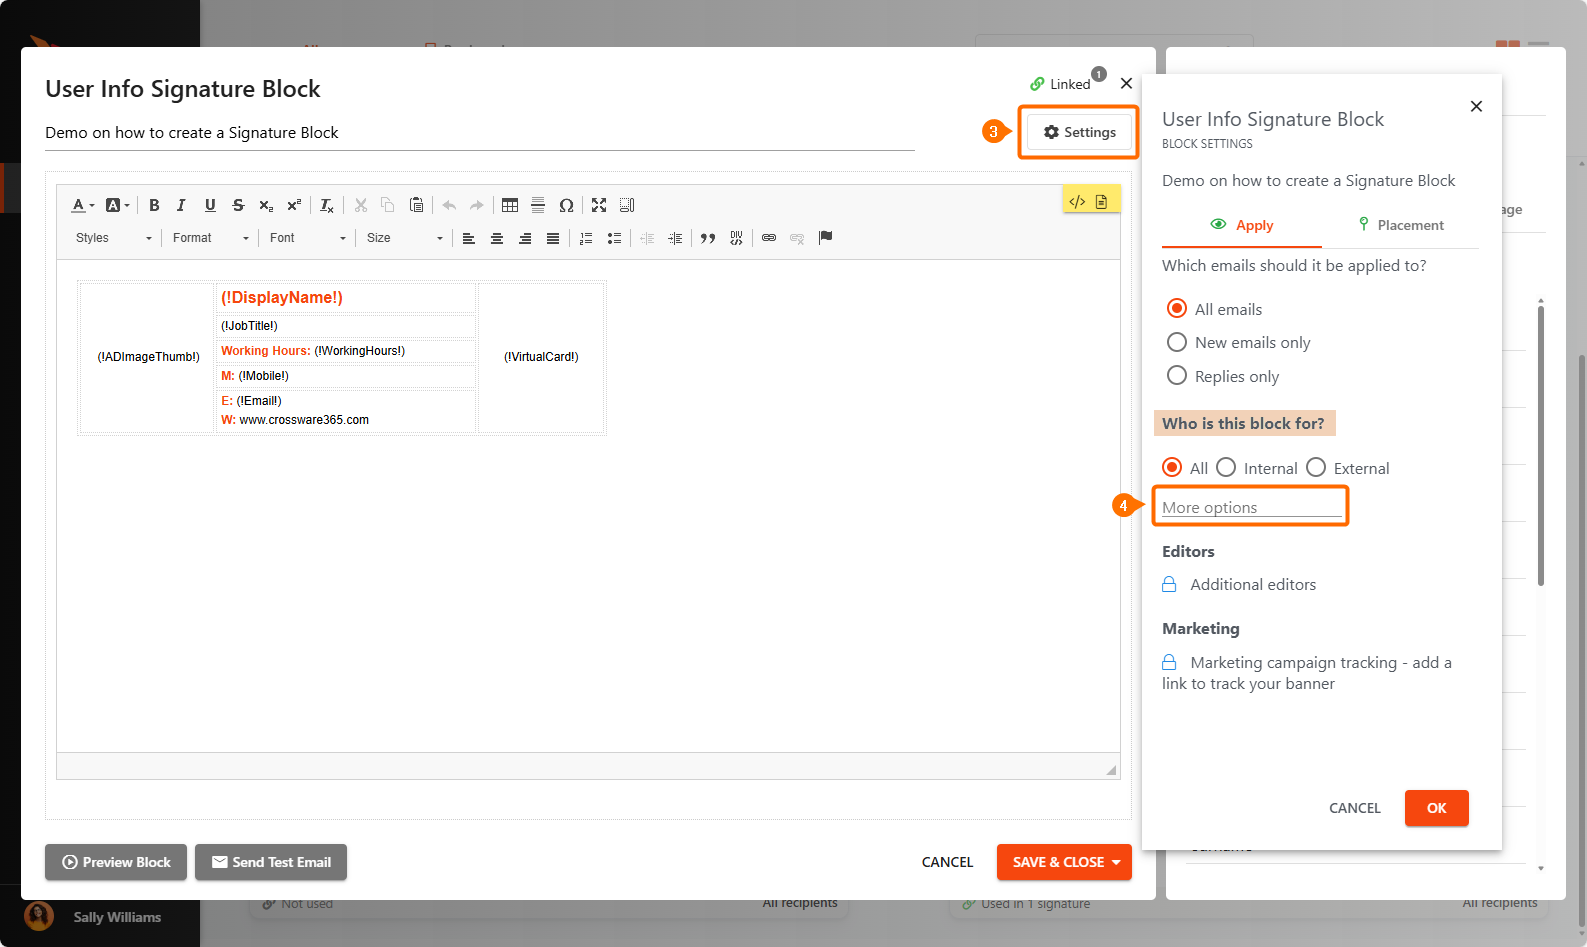
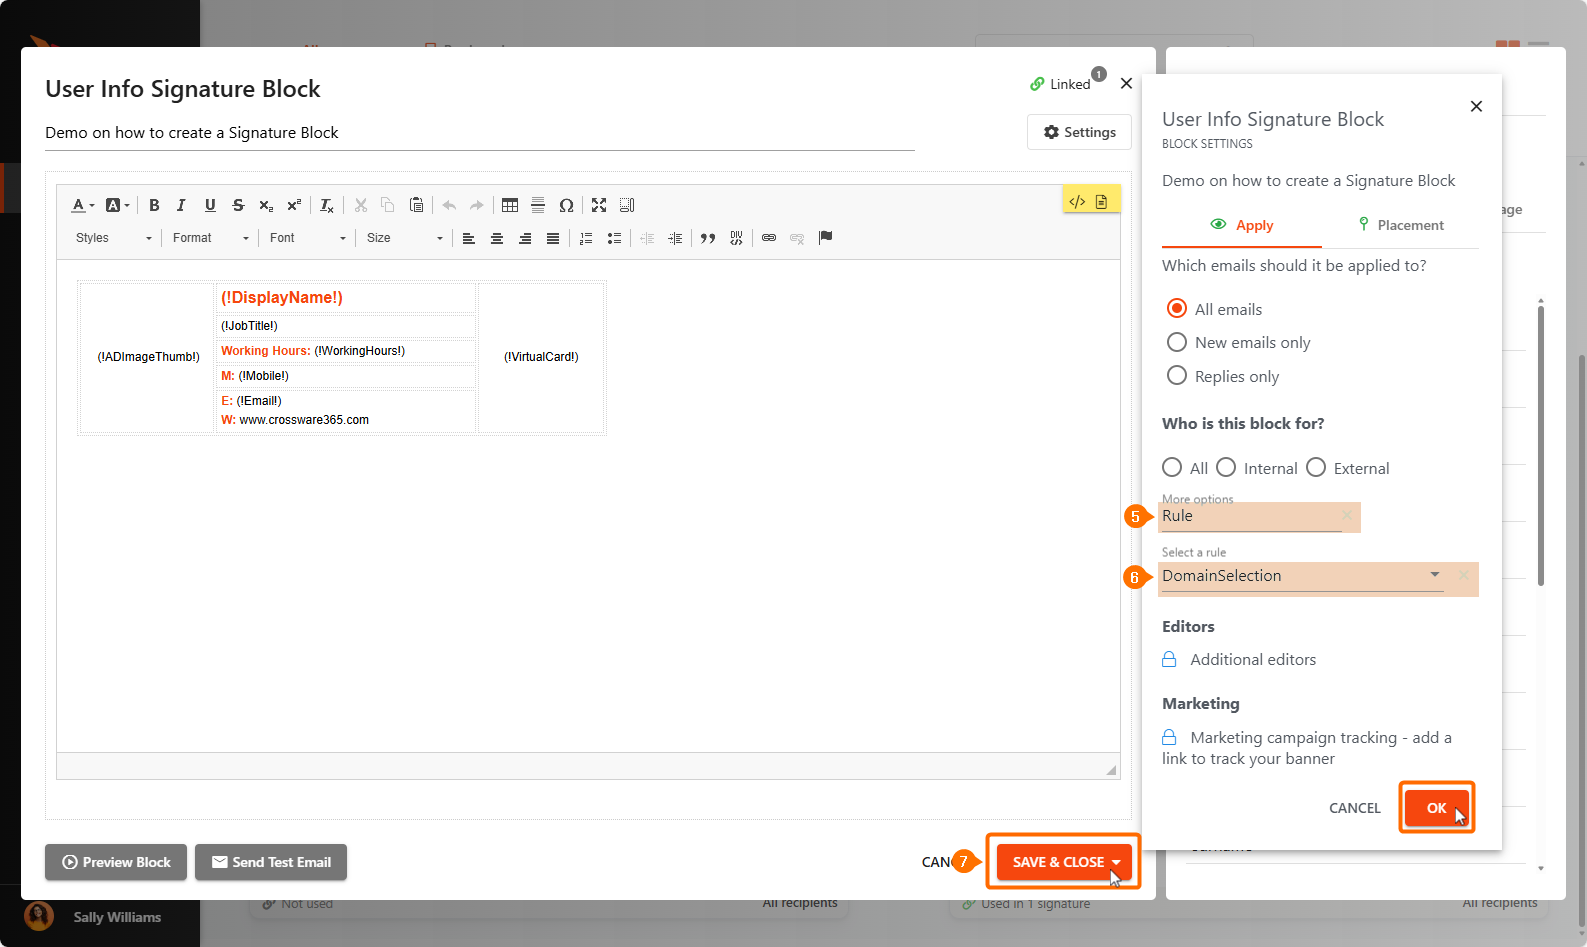
Applying Rule to a Signature Block
-
Go to Blocks in the Crossware Portal.
-
Select the block you wish to use and click Edit.
-
Click Settings.
-
Under Who is this block for?, select More options.
-
Click Rule.
-
Select Select a rule, then choose the rule you previously created from the drop-down list.
-
Click SAVE & CLOSE.
Use of Rules