
You can assign specific email signatures to users based on their department in Azure Active Directory (Azure AD) or Active Directory (AD). To do this, create a custom rule in Crossware.
This method works as a workaround for applying signatures to Dynamic Distribution Groups in Crossware.
Create a Rule
-
Sign in to the Crossware Portal and navigate to the Rules section.
-
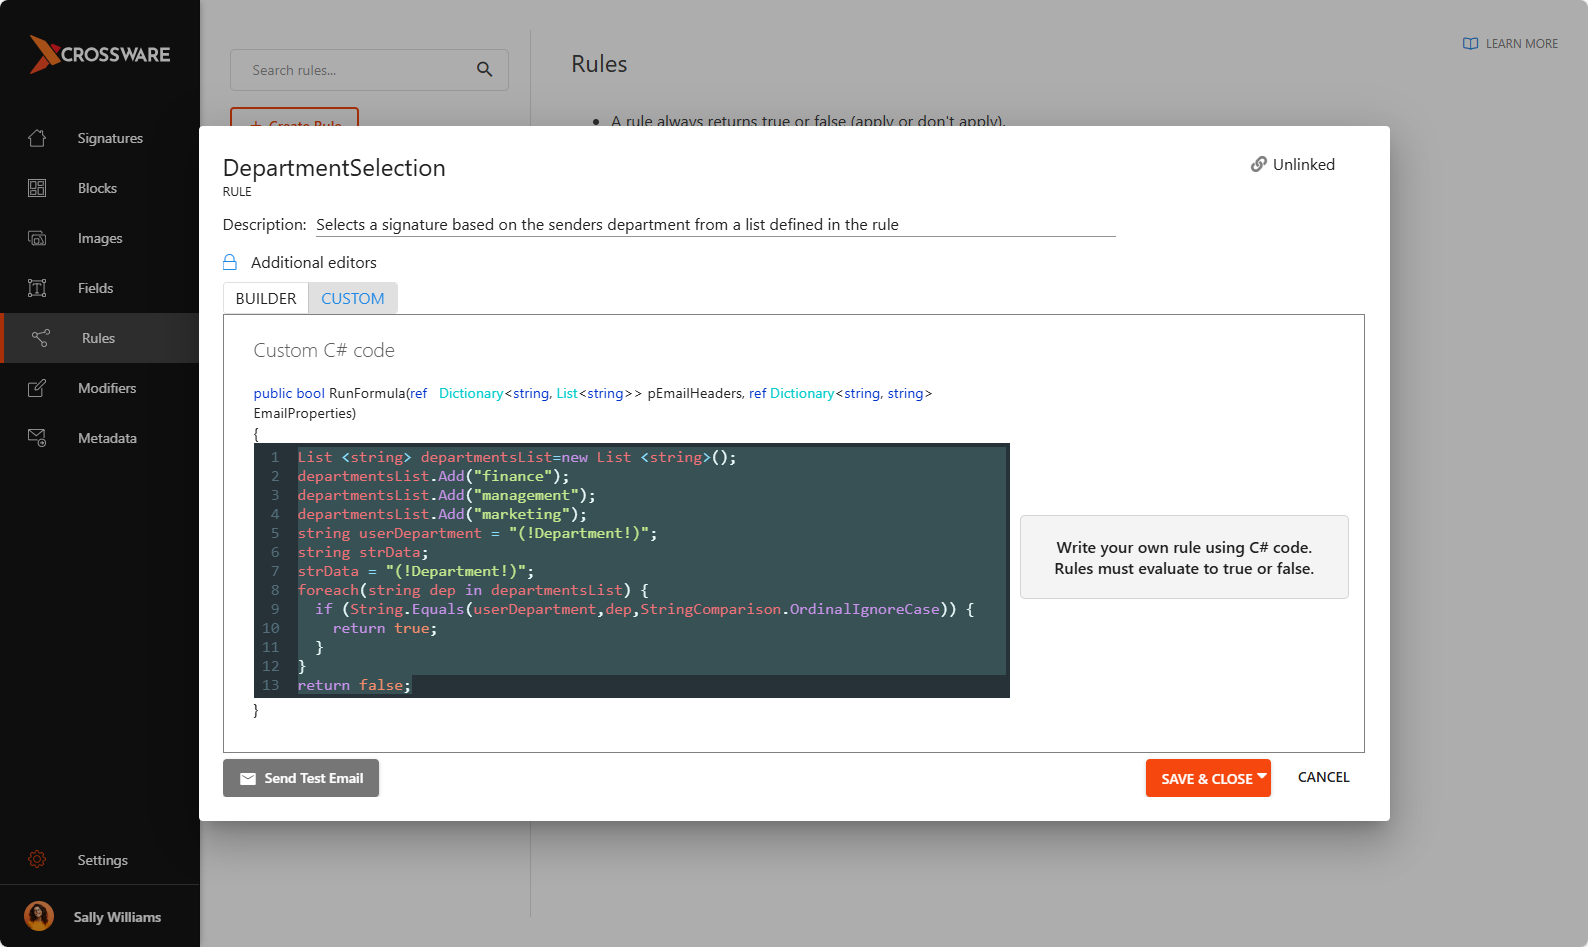
Select New Rule and enter a name (for example,
DepartmentSelection).
We have the rule DepartmentSelection loaded in the signature database
-
Click the CUSTOM tab and Add one of the following C# scripts, depending on your scenario.
Example: One Department
This script applies the signature only when the sender belongs to the Finance department.
string strDepartment;
strDepartment = "(!Department!)";

if (strDepartment == "Finance") {
 return true;
}
return false;
Example: Multiple Departments
This script applies the signature when the sender’s department matches any department in the list.
List <string> departmentsList=new List <string>();
departmentsList.Add("finance");
departmentsList.Add("management");
departmentsList.Add("marketing");
string userDepartment = "(!Department!)";
string strData;
strData = "(!Department!)";
foreach(string dep in departmentsList) {
  if (String.Equals(userDepartment,dep,StringComparison.OrdinalIgnoreCase)) {
    return true;
  }
}
return false;
Link the Rule to a Signature or Signature Block
-
Apply the Rule to a Signature - Assign the rule to an existing email signature.
-
Apply the Rule to a Signature Block - Assign the rule to a specific block within the signature.
Set Signature Priority
-
Go to Order of Selection.
-
Make sure the rule-linked signature is placed above default signatures so it’s evaluated first.
Test the Setup
-
Send a test email from a user in the specified department.
-
Verify that the correct signature is applied based on the rule.
Crossware automatically applies the signature assigned for specific department in your organisation.