
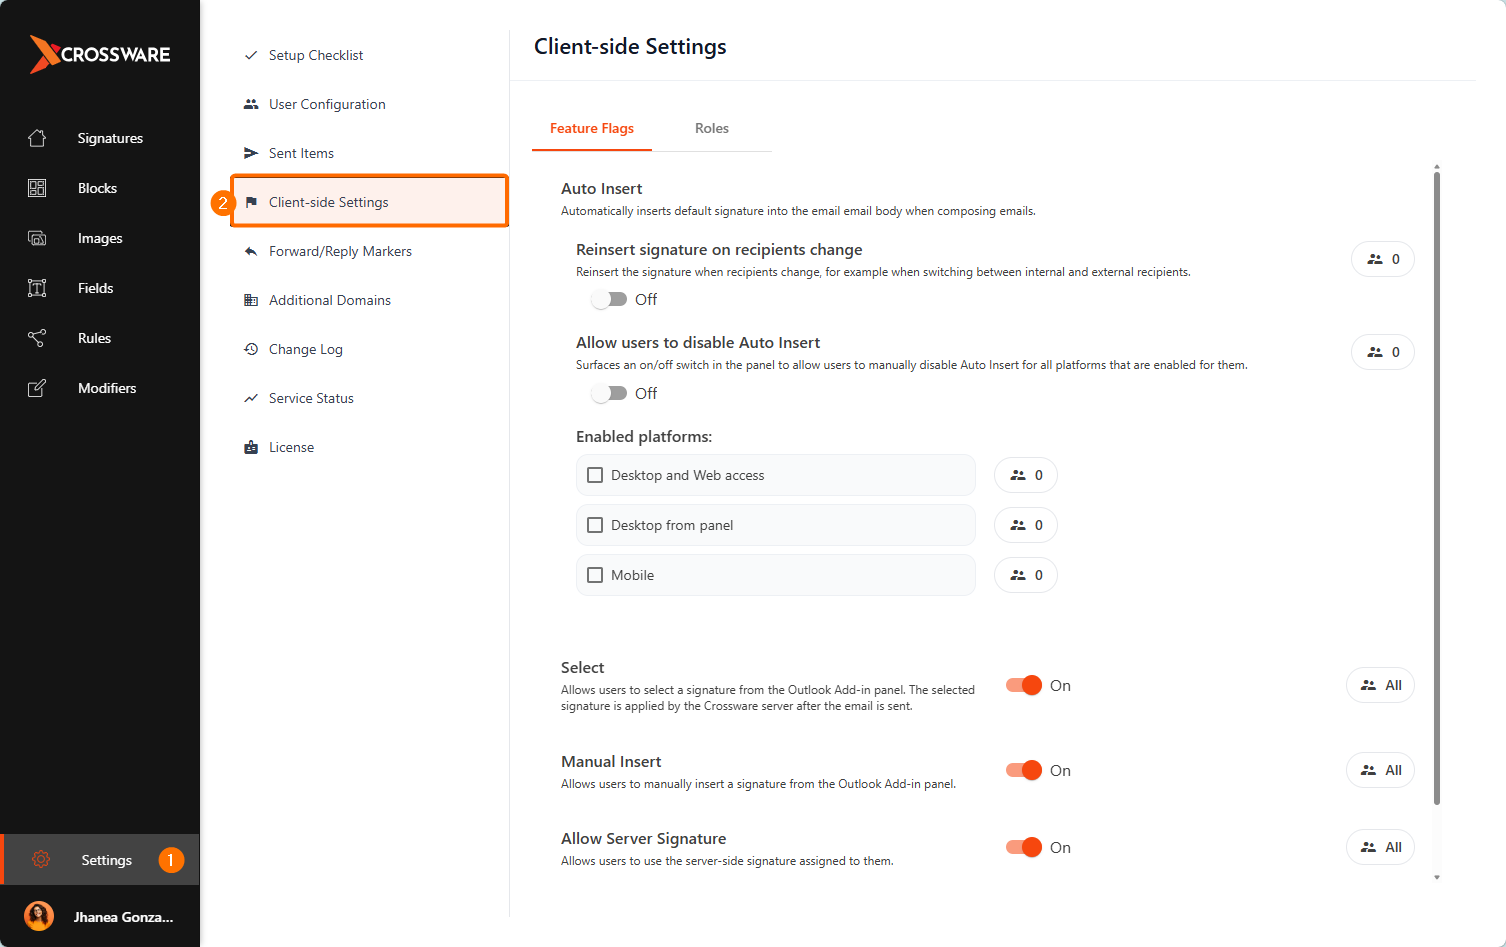
The Client-side Settings page allows administrators to configure features available in the Crossware Outlook Add-in. These settings control how signatures are applied and which features are available to end users.
To access this page:
-
Navigate to Settings.
-
Select Client-side Settings.
Feature Flags
The Feature Flags tab allows administrators to configure client-side features available to users, including how signatures are inserted and managed in Outlook.
Auto Insert
Auto Insert automatically inserts the user's default signature into the email body when composing a new email.
Initial Signature
Select the type of signature to insert when no recipients have been entered:
-
Internal signature – Inserts the internal signature.
-
External signature – Inserts the external signature.
Users can override this setting from the Outlook Add-in settings panel.
Reinsert signature on recipients change
Automatically reapplies the signature when recipients change, such as when switching between internal and external recipients.
Enabled platforms
Select the platforms where Auto Insert is available:
-
Desktop and Web access – Outlook on the web and Outlook desktop.
-
Desktop from panel – Outlook desktop using the add-in panel.
-
Mobile – Outlook mobile.
Select
Allows users to select a signature from the Outlook Add-in panel.
The selected signature is applied by the Crossware server after the email is sent.
Manual Insert
Allows users to manually insert a signature from the Outlook Add-in panel.
Add-in Admin
Allows administrators to manage user settings directly from the Outlook Add-in.
Display messaging
Controls whether informational messages are displayed at the top of the email.
Users can override this setting from the Outlook Add-in settings panel.
The Display messaging and Initial Signature settings have been moved from the Outlook Add-in settings panel to the Feature Flags tab. Administrators can now manage these settings centrally from the Designer Portal.
Enabling a Feature
To enable a client-side feature:
-
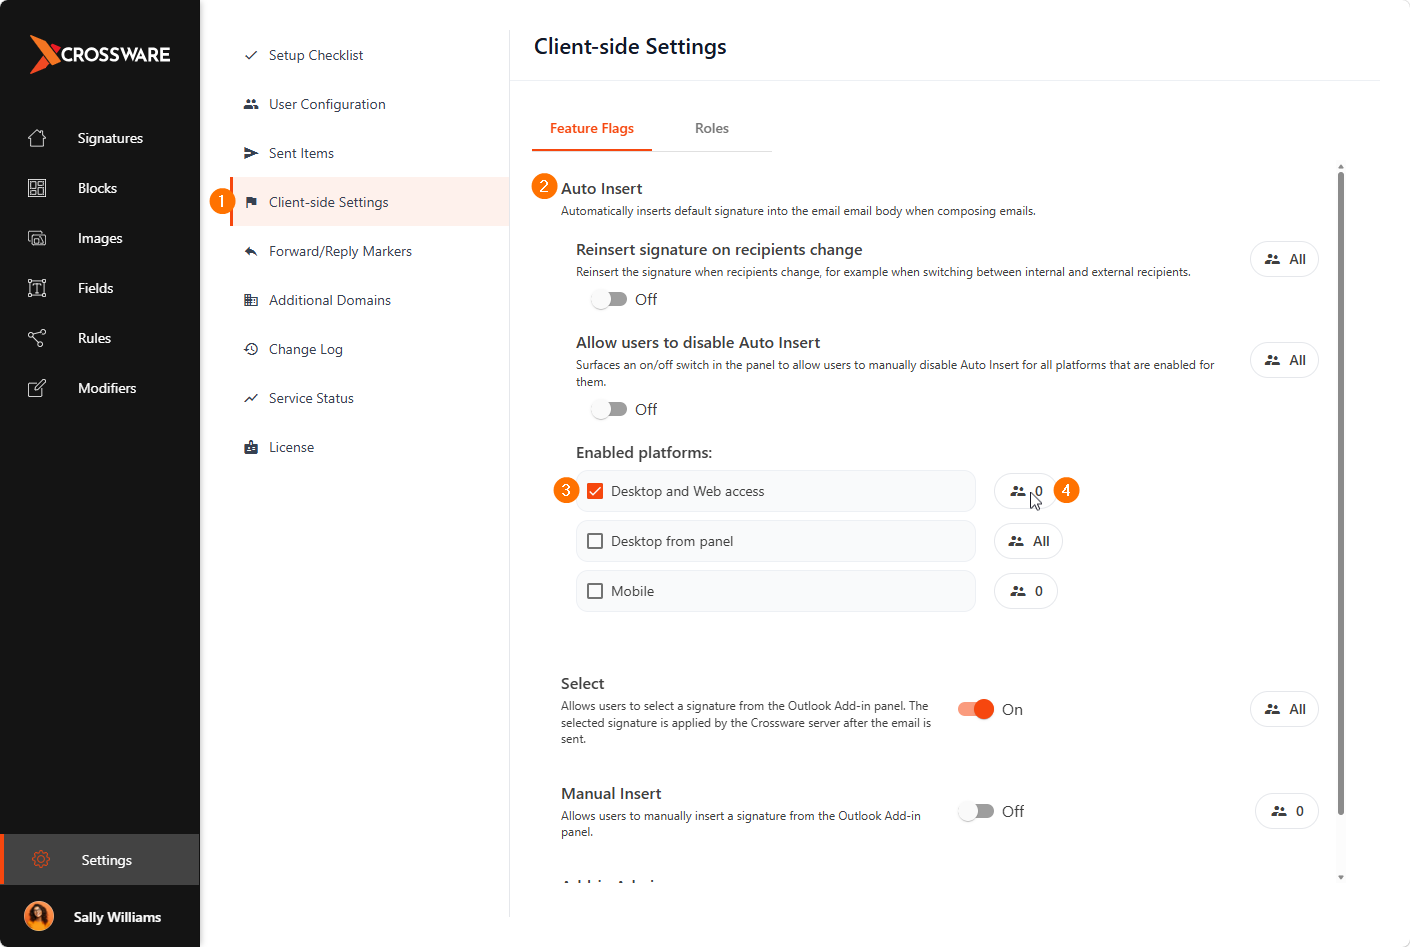
Navigate to Client-side Settings.
-
Locate the feature you want to configure.
-
Turn the feature On. (For Auto-Insert, select the platform(s) where you want the feature to apply.)
-
Click Users/Roles.
-
Choose who the feature should be available to:
-
All users
-
Selected roles - Tick one or more roles from the list.
-
-
Click Save to apply your changes.
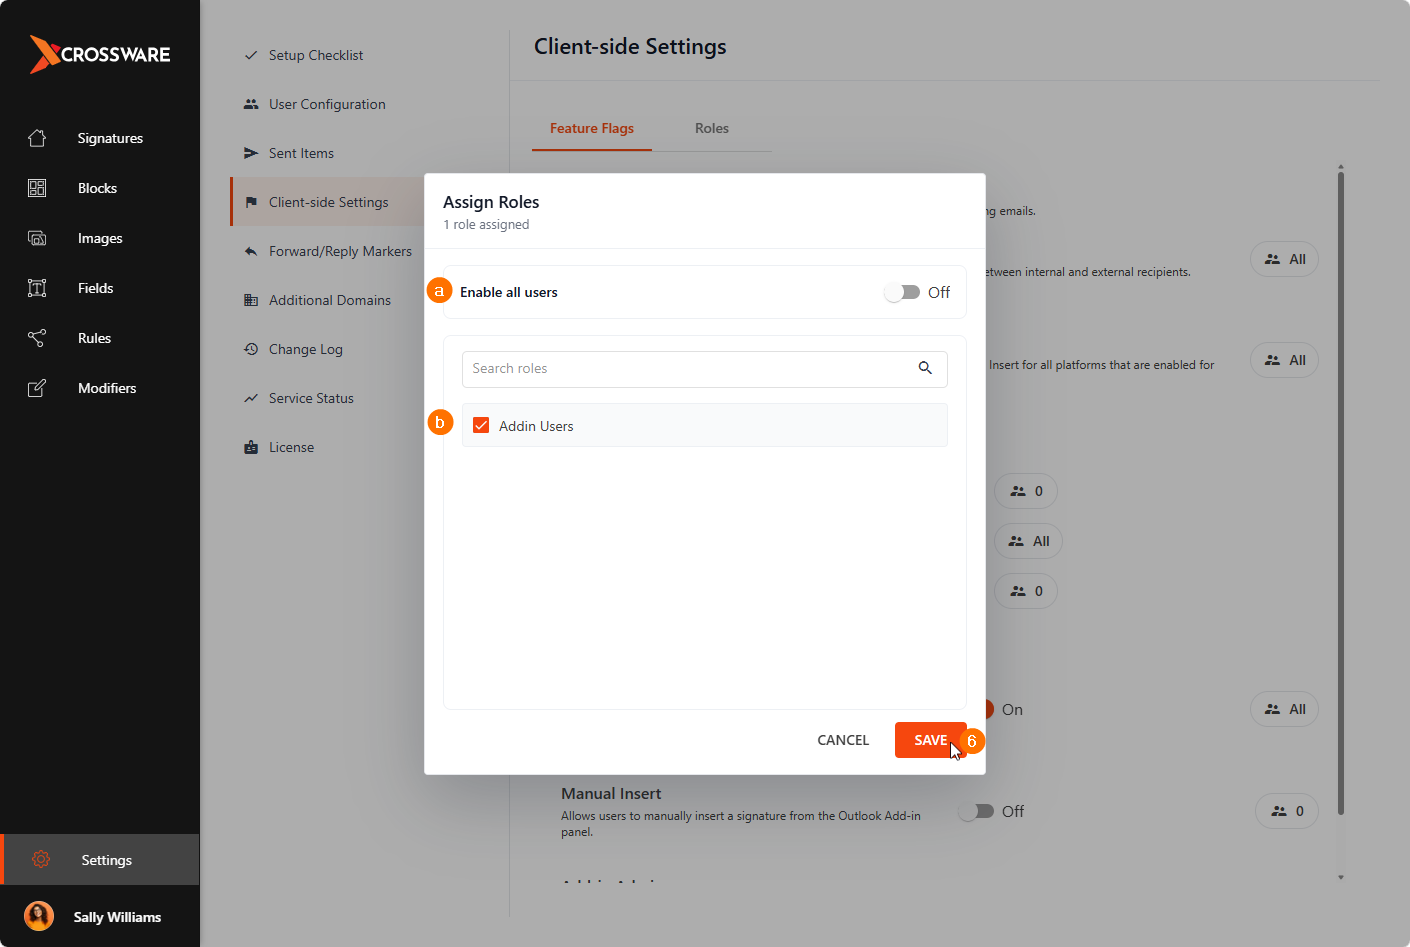
If a feature is enabled but is not assigned to any users or roles, it will not be available to end users.
Roles
The Roles tab allows you to manage role-based access for client-side features. Features can be assigned to specific roles, allowing different groups of users to have different functionality within the Outlook Add-in.
Add a Role
To create a new role:
-
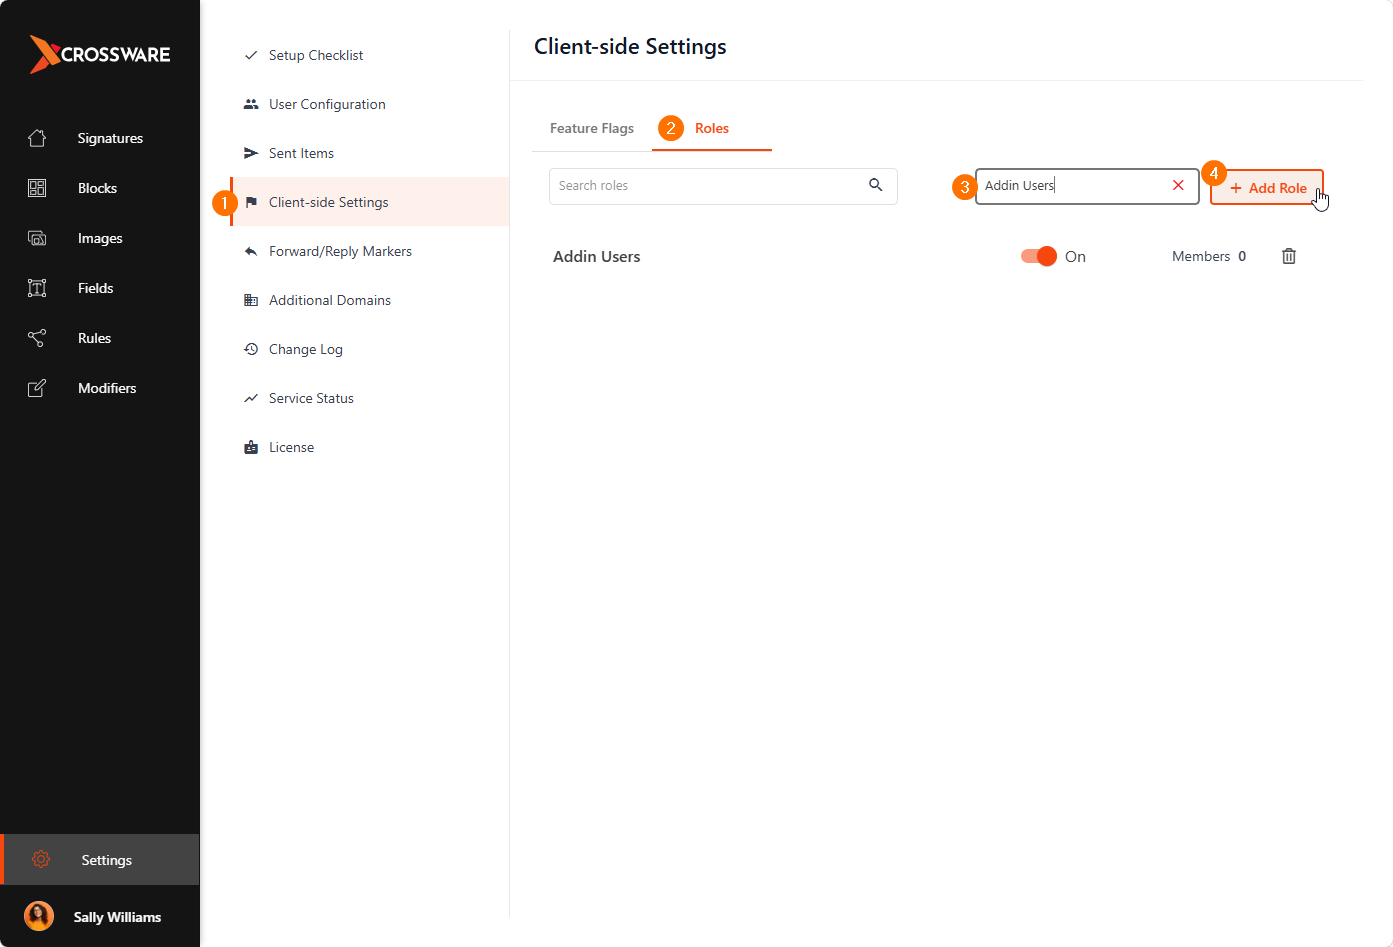
Go to Client-side Settings.
-
Select the Roles tab.
-
In the Type role name field, enter a name for the role.
-
Click Add Role.
The new role will be available for assignment when configuring client-side features.
Assign Users or Groups to a Role
After creating a role, you can assign users or groups from your Microsoft 365 directory.
-
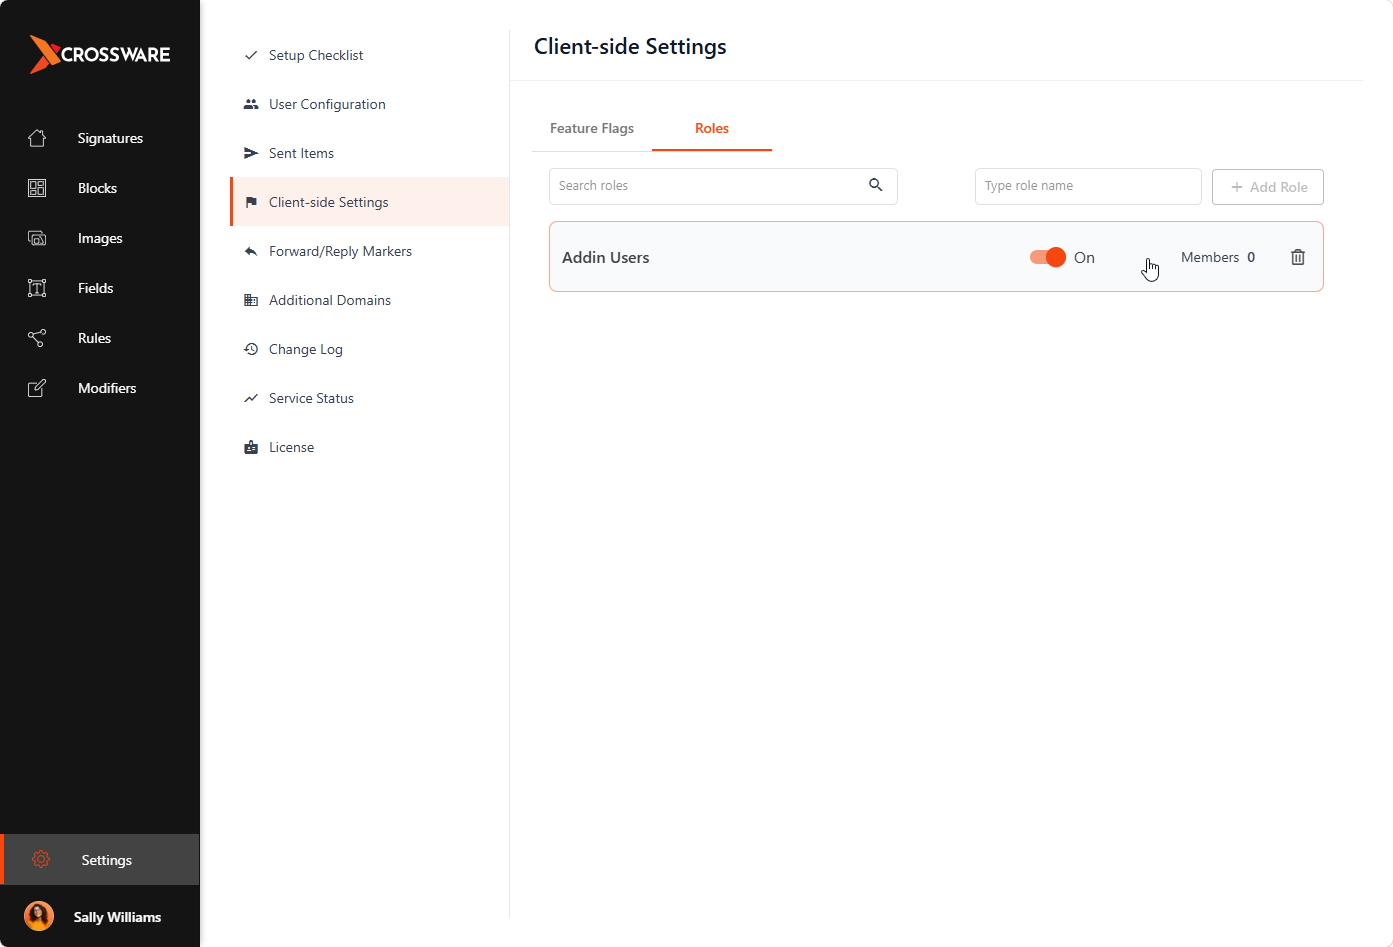
Go to Client-side Settings > Roles.
-
Select the role you want to manage.
-
Click Add User/Group.
-
Search for and select the required user or group from your Microsoft 365 directory.
-
Click Add User or Add Group to assign them to the role.
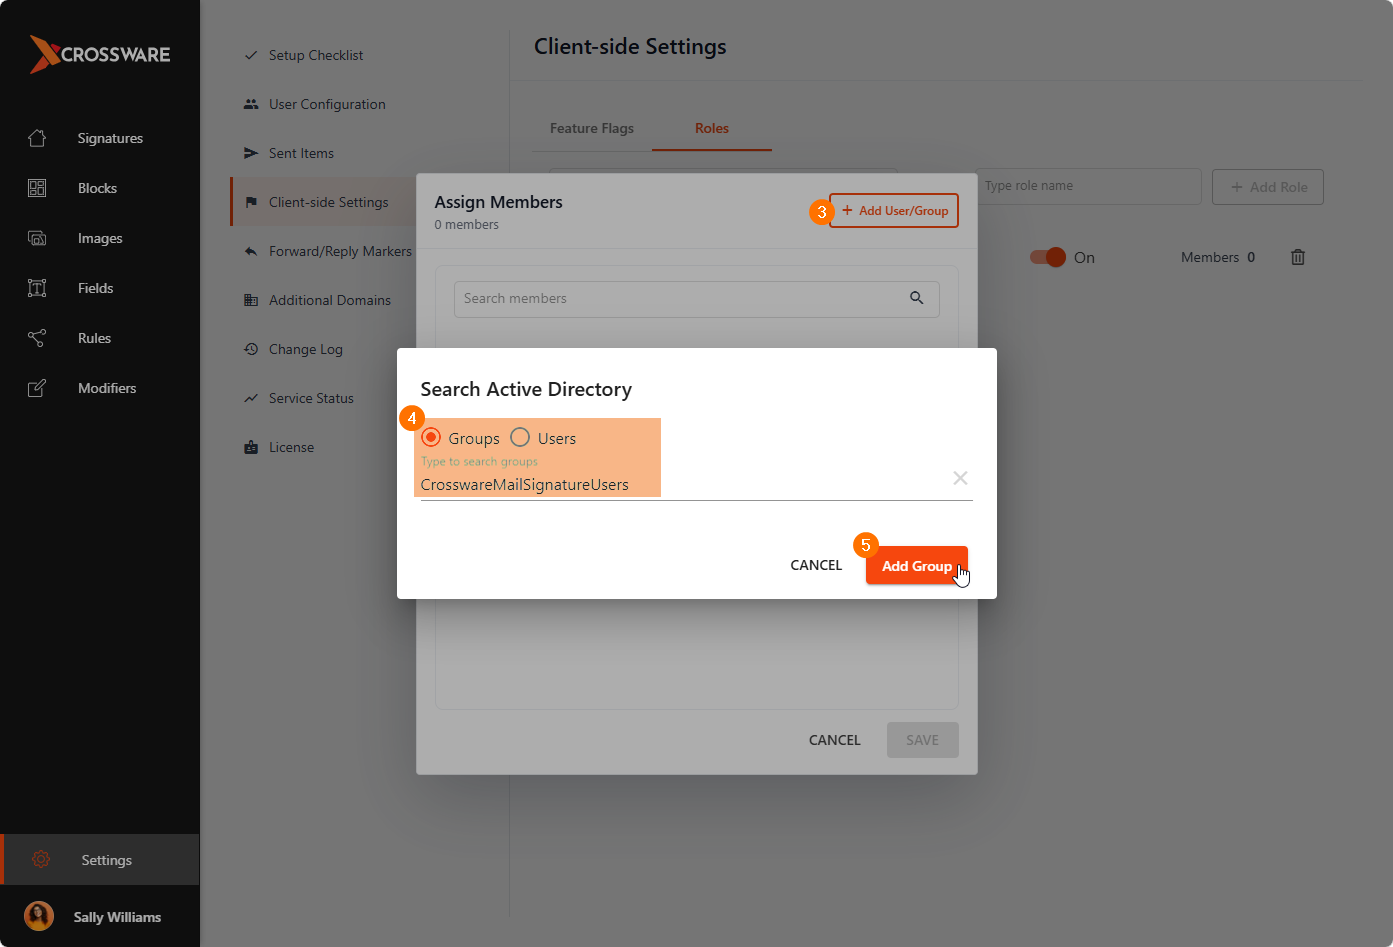
Assigned users and groups will inherit any client-side features configured for that role.