What is a Field
A field is a wild card string that helps to insert user customised information into the signature. The fields do a look up into your Directory and pull out the desired information.
Crossware Email Signature uses an exclamation mark (!String!) to perform this function.
These fields can extract information from your:
-
Active Directory (AD)
-
A custom C# script
Look at the following example:

You can identify three fields:
(!DisplayName!) - This will extract the display name of the user from the Directory
(!Position!) - This will get the position of the user
(!Email!) - This will pull the email address of the user
NOTE: We have already done the hard-work for you and configured all of the non-system fields supported by Microsoft 365. So, all you have to do is expand the 'field' twistie and add the desired field to your signature.
Creating a New Field
-
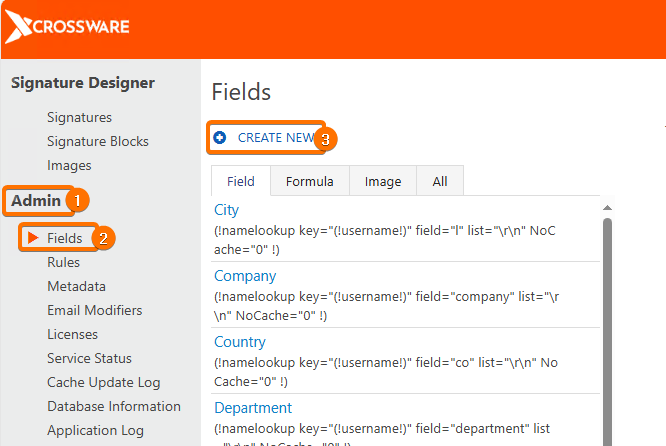
Go to Admin in the main menu.
-
Select Fields from the left-hand side menu.
-
Click CREATE NEW.
-
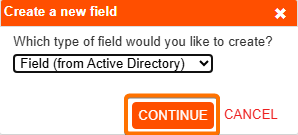
In the Create a new field dialog box that appears, select the type of field you want to create.
-
Select your option and click on Continue.
Create a new field type
a. Field (from Active Directory): Extracts information from your Directory.
b. Formula: This is a C# Script that returns a text value. (See Formula Field)
c. Image: Retrieves an image either from the Image Library or from your WAAD. (See Image Fields)
Field Configuration
Following is an overview of different components of the Field Configuration document.
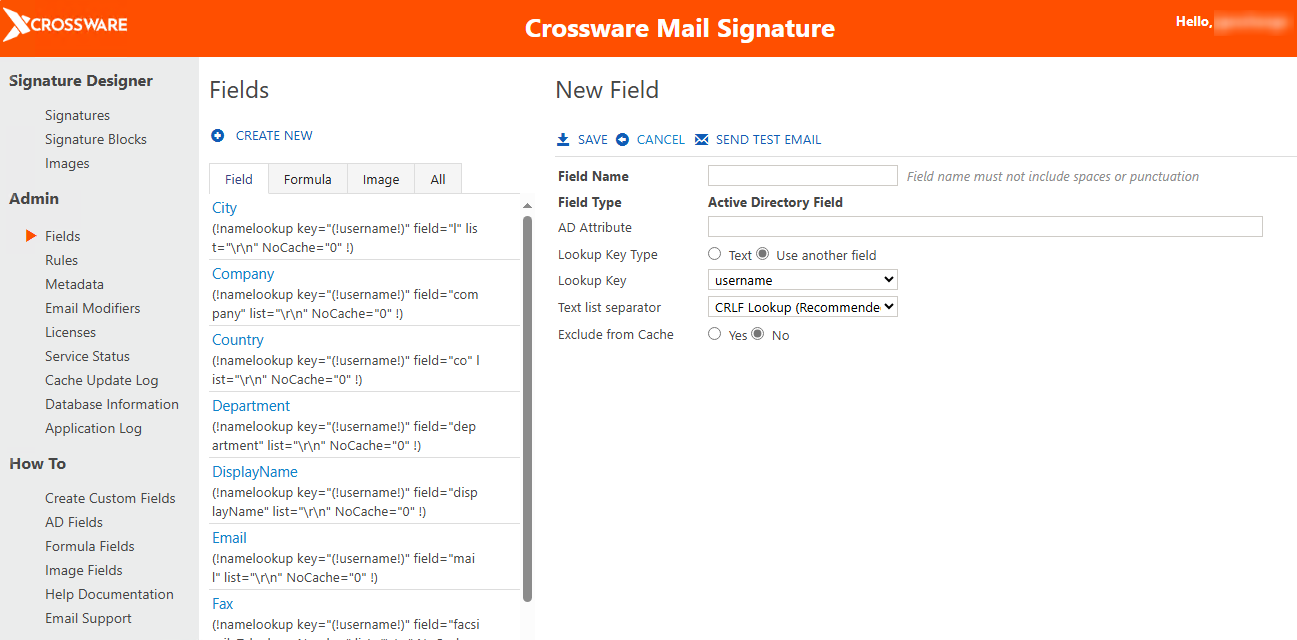
Field Name
This is the name given for the field lookup.
Field Type
This field is populated automatically depending on your selection for Create a new field - Field (From Active Directory), Formula, Image.
AD Attribute
The Name of the field in Active Directory
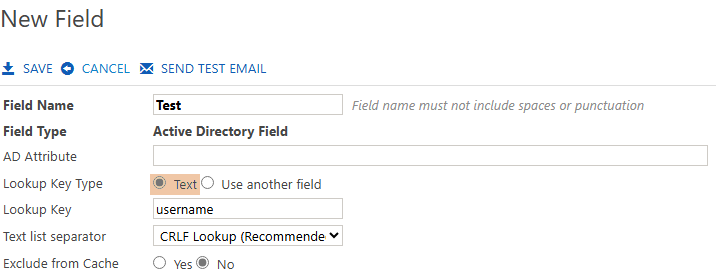
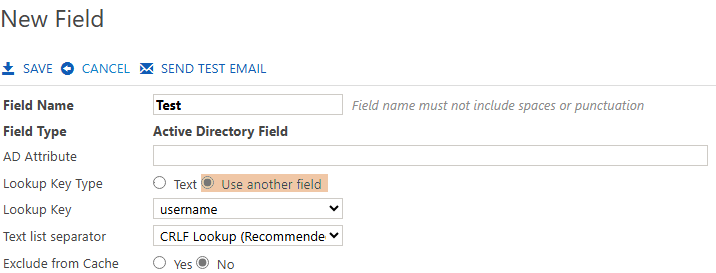
Lookup Key Type
Your lookup field key can either be a text field or look up an existing field.
If you change the key from Text to Use another field you will see that the field Lookup Key populates with drop down arrow for fields to select from.
Text List Separator
This setting controls how Text Lists are formatted when returned. By default, text lists will be on separate lines when inserted into the email.
When custom fields are used in other fieldse.g. In a formula field, then a Carriage Return/Line Feed is not suitable.
Therefore, a different separator can be used.
Let us have a look at the various Text list separators:
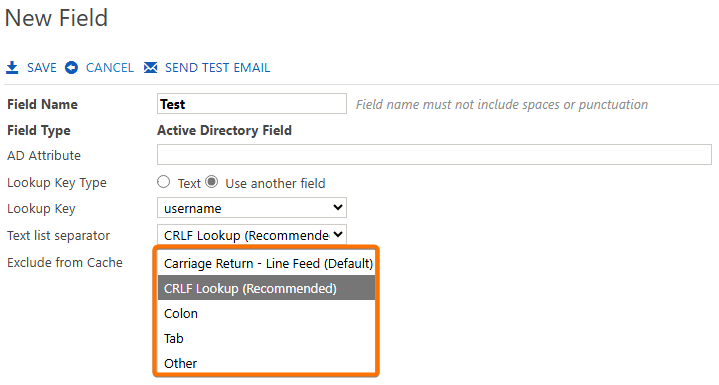
a. Carriage Return-Line Feed (Default): This is the default text list separator which ensures that each entry will be on a new line.
b. Colon: Text items will be separated by a colon.
c. Tab: Text items will be separated by a tab character.
Exclude From Caching
You can select a Yes or No for this field depending upon your requirements. The best practice is to not exclude the configurations from caching, so that future requests for that data or field can be served faster.
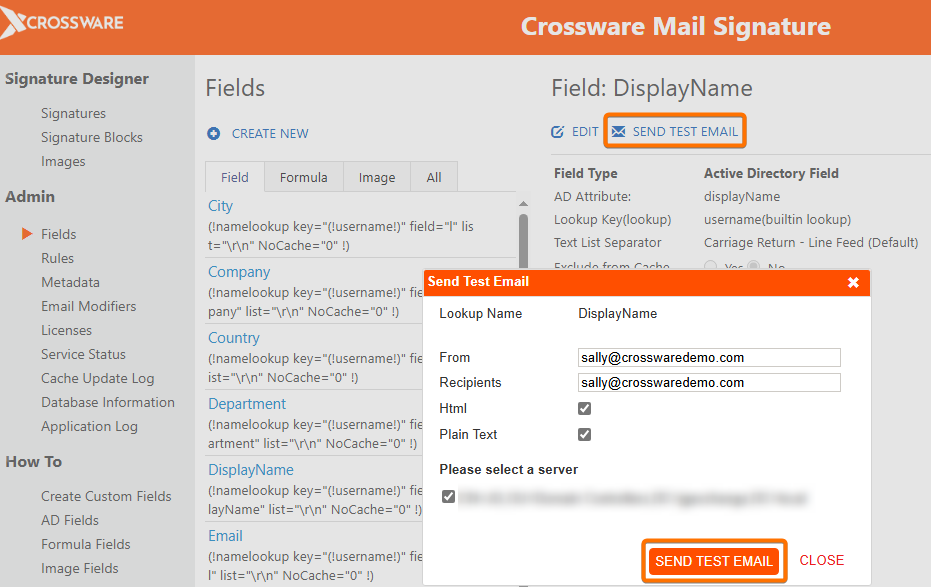
Testing Field Configuration
Once you have finished creating your custom field, click Save.
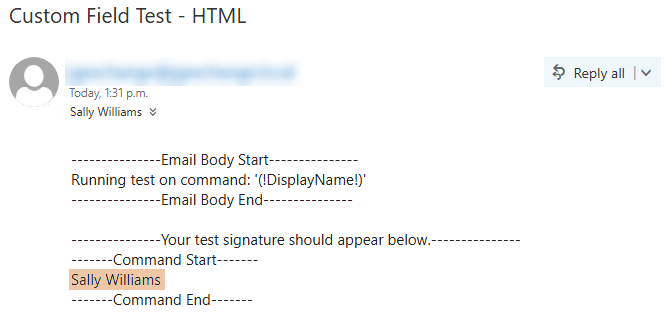
Next, click Send Test Email and send a test message to an email account to verify that your lookup is working correctly.
This email will be processed by Crossware Email Signature as it passes through your Exchange Server, where the application is installed and the lookup is evaluated.