
Prerequisites
Before starting, ensure you have:
-
A Google Workspace Super Admin account.
-
Your Google Customer ID (Admin Console → Account → Account Settings → Profile).
-
The following details ready to provide to Crossware Support:
-
Company name (e.g. Crossware Limited)
-
Primary domain or all domains if you use more than one (e.g. crosswaredemo.com)
-
Admin email (ideally a Global Admin, e.g. admin@crosswaredemo.com)
-
If you have not yet supplied this information, please complete the Google Workspace Free Trial Form or email support@crossware365.com with the details above.
Wait for confirmation from our support team before continuing.
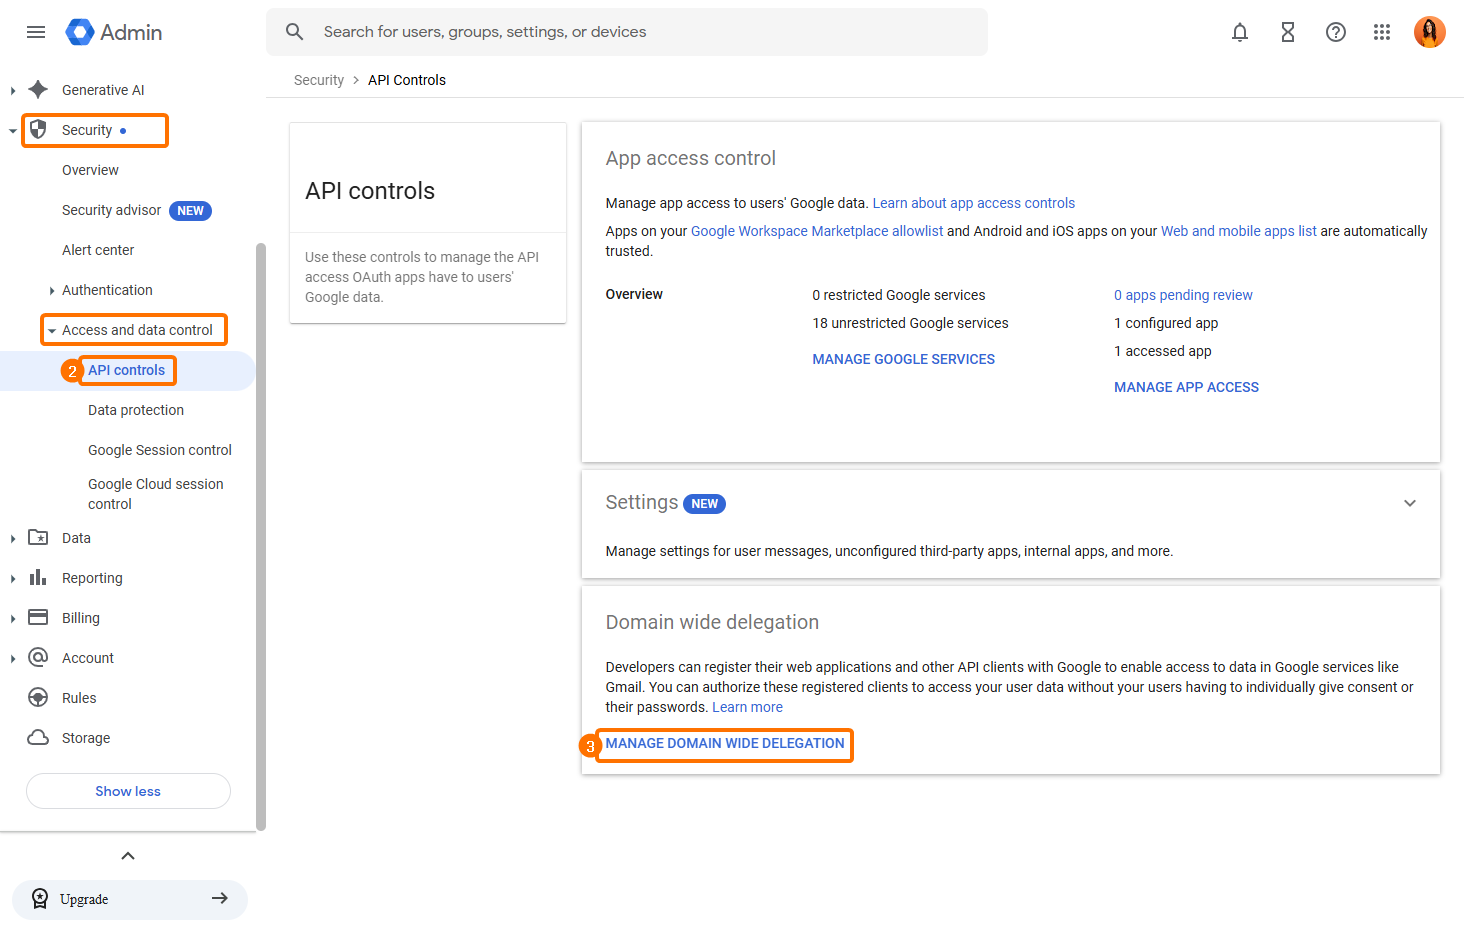
Configure Domain-wide Delegation
-
Sign in at admin.google.com.
-
Go to Security → Access and Data Control → API Controls.
-
Select Manage Domain-wide Delegation → Add New.
-
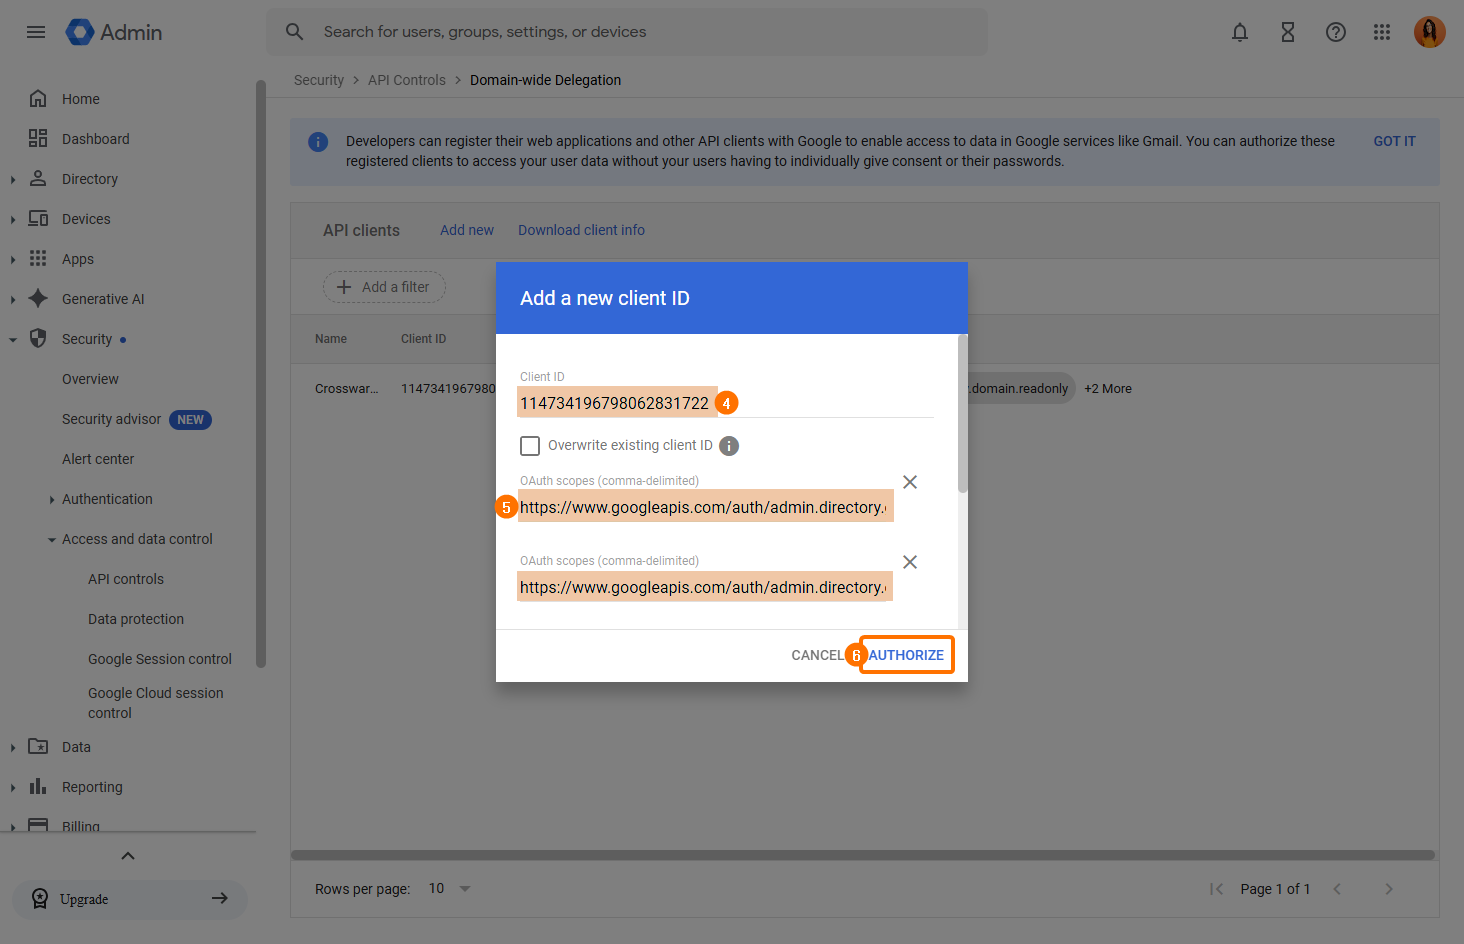
Enter Crossware’s client ID:
114734196798062831722 -
Add the following API scopes:
-
Click Authorise.
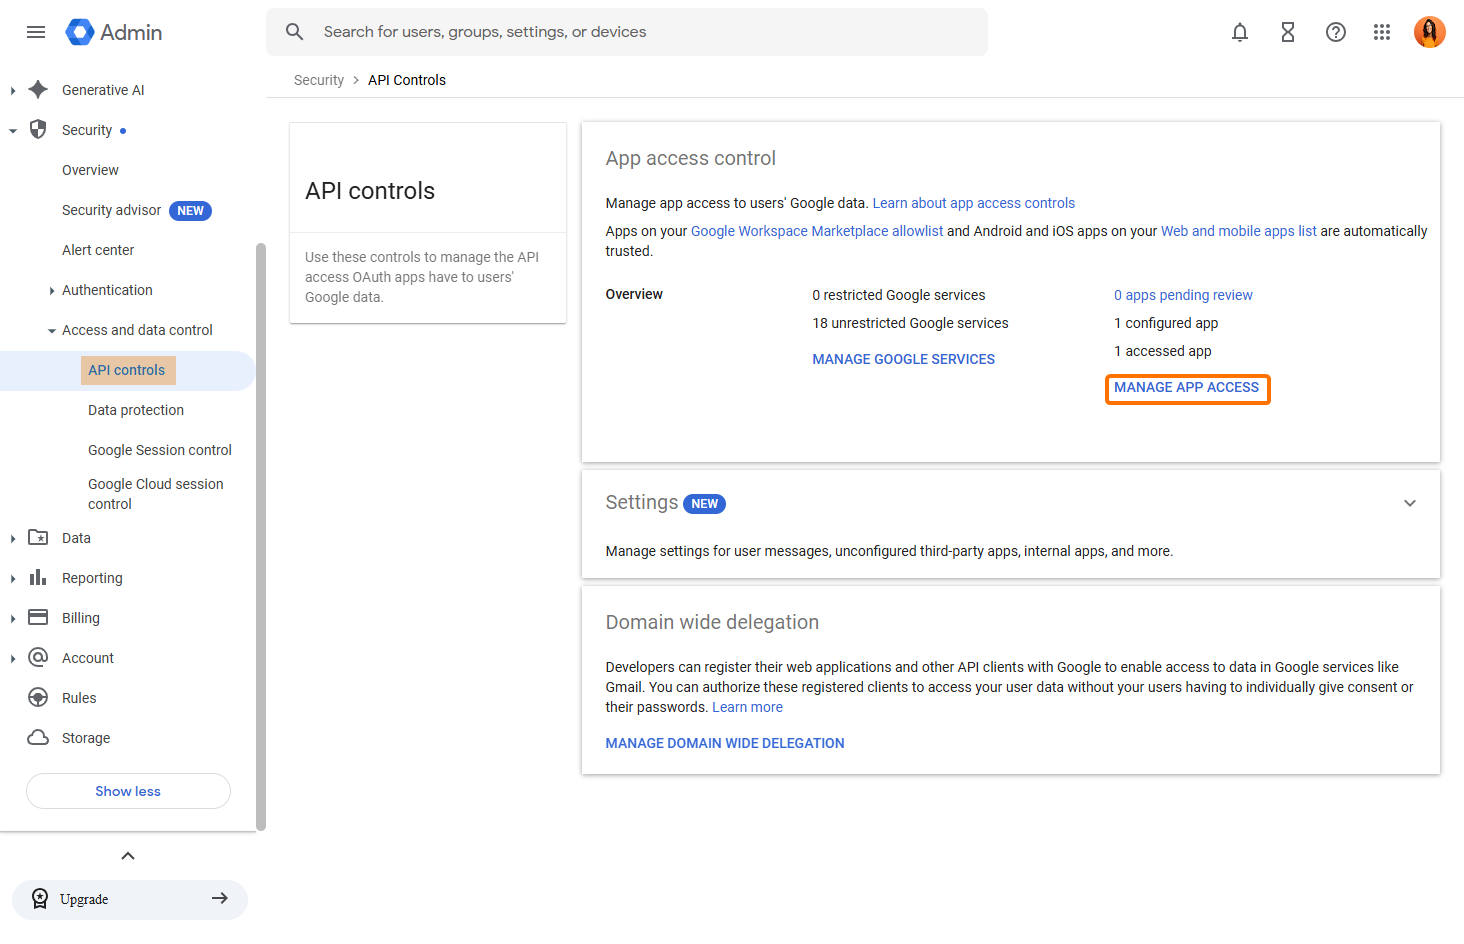
Allow Third-party App Access
-
In API Controls, go to Manage App Access.
-
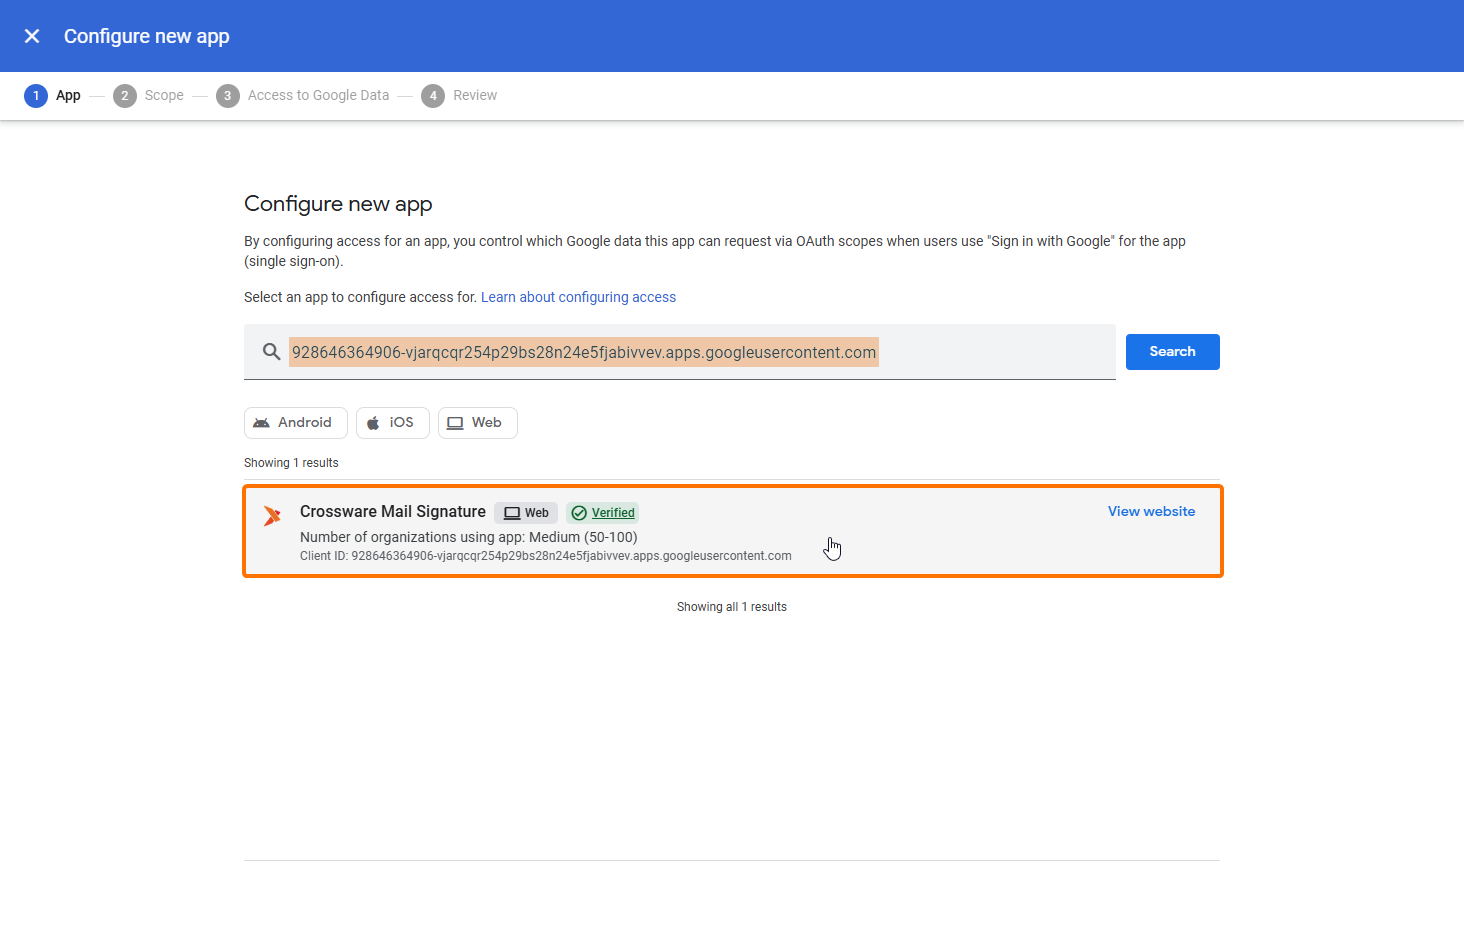
Click Configure New App.
-
Enter this client ID:
928646364906-vjarqcqr254p29bs28n24e5fjabivvev.apps.googleusercontent.com -
Search for Crossware Mail Signature and select it.
-
Select All users and click Continue.
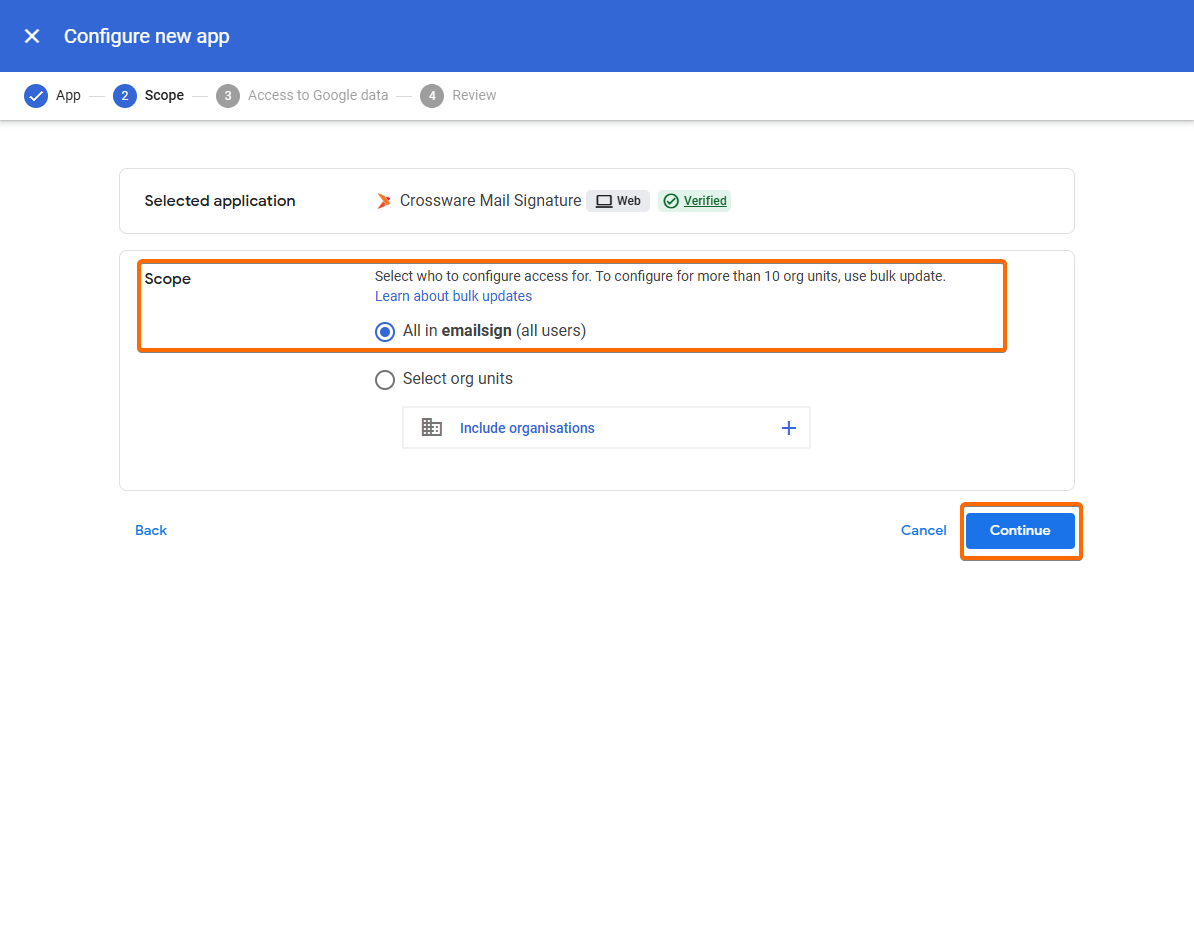
-
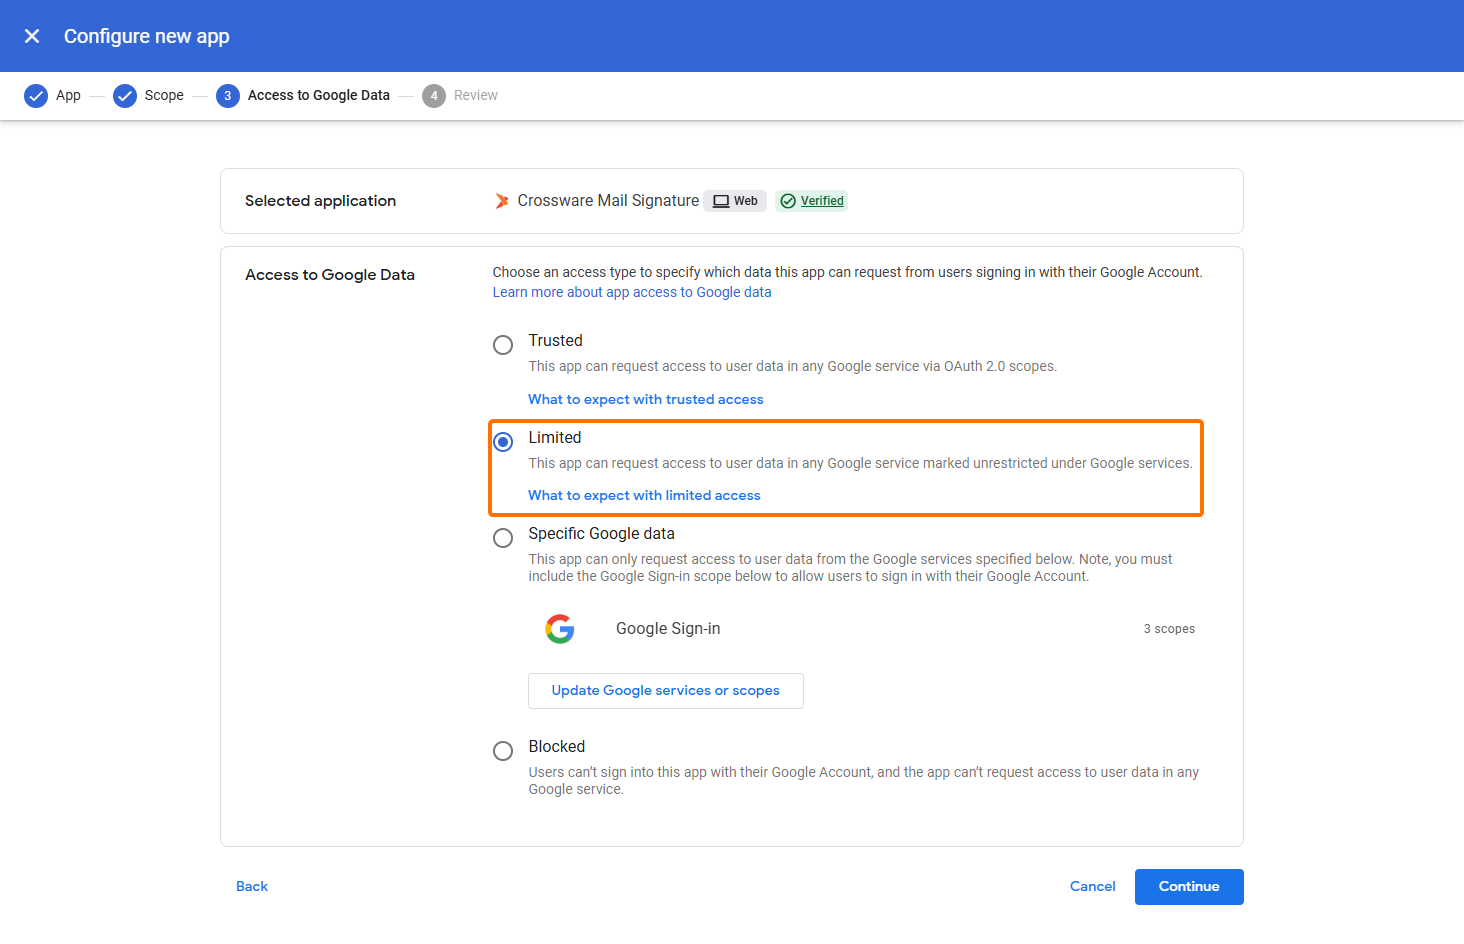
Set the app access to Limited and click Continue.
-
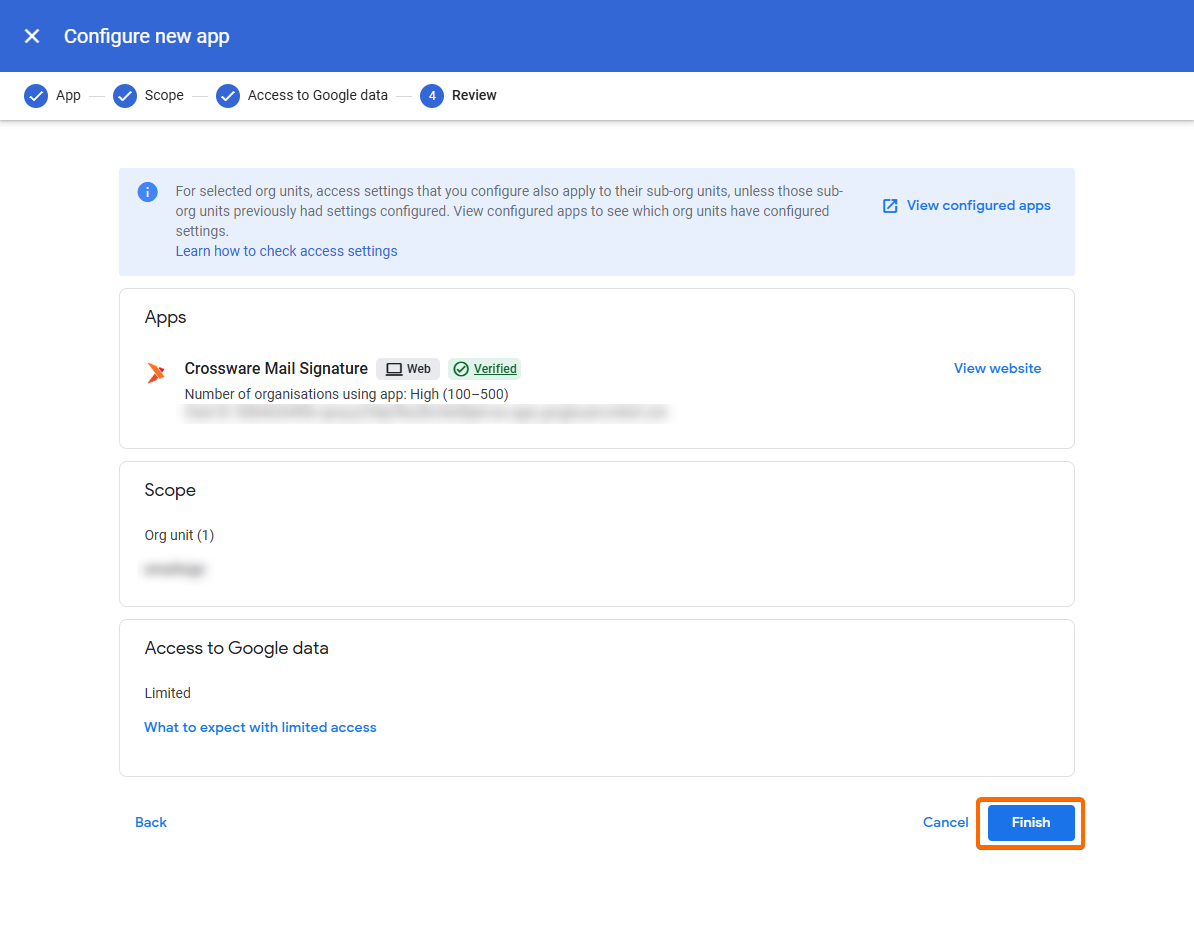
Click Finish.
Create User and Admin Groups
-
From the Directory menu, choose Groups.
-
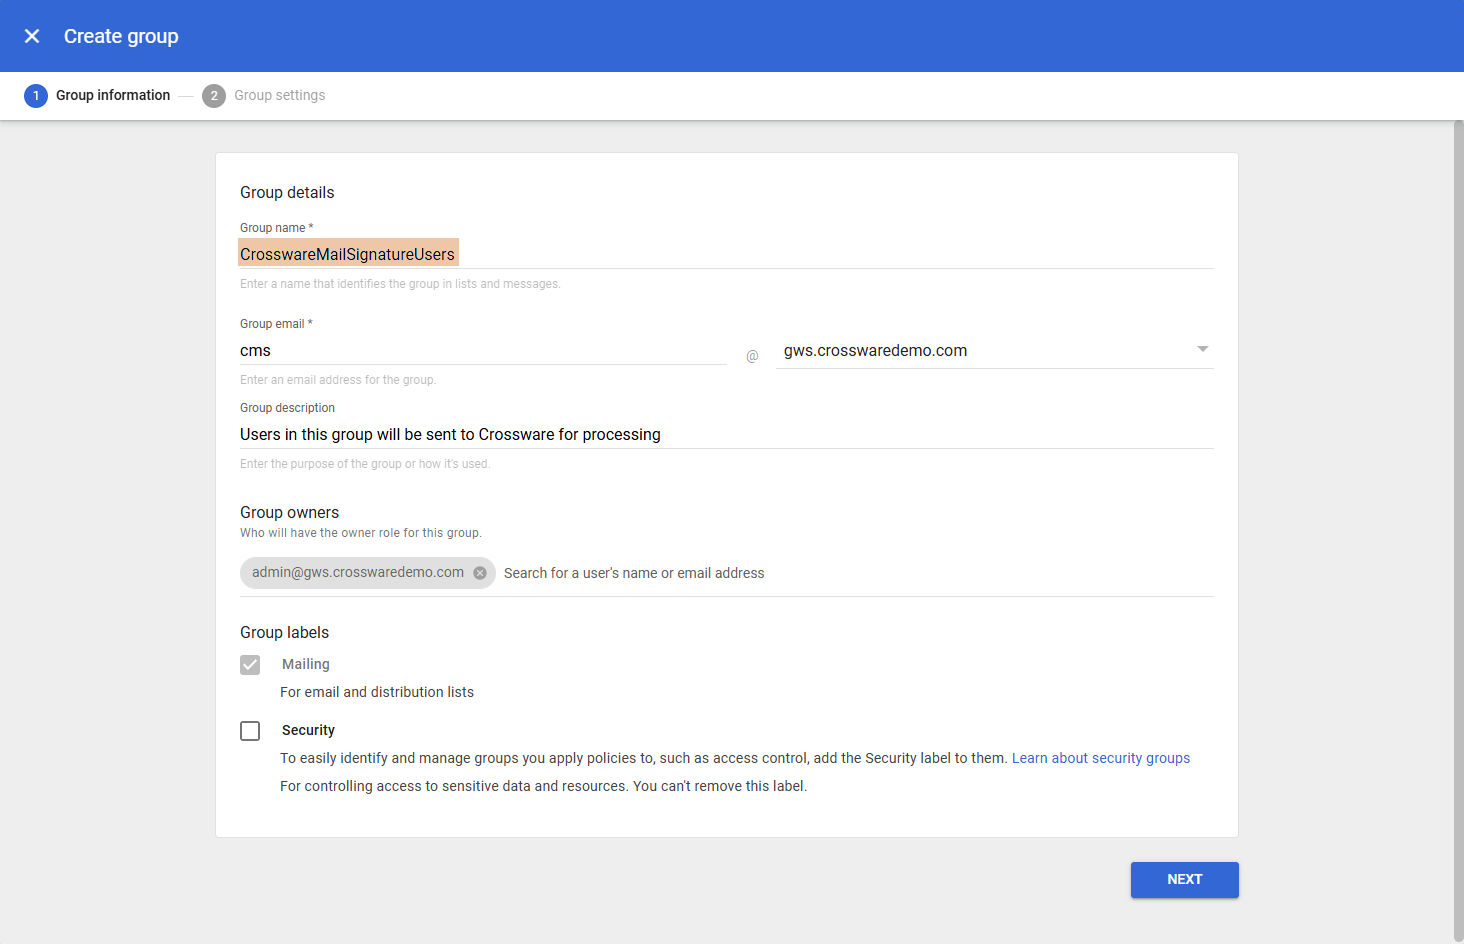
Create a group named CrosswareMailSignatureUsers.
-
Assign an email address.
-
Add a description.
-
Set an owner (preferably a Super Admin).
-
-
Click CREATE GROUP.
-
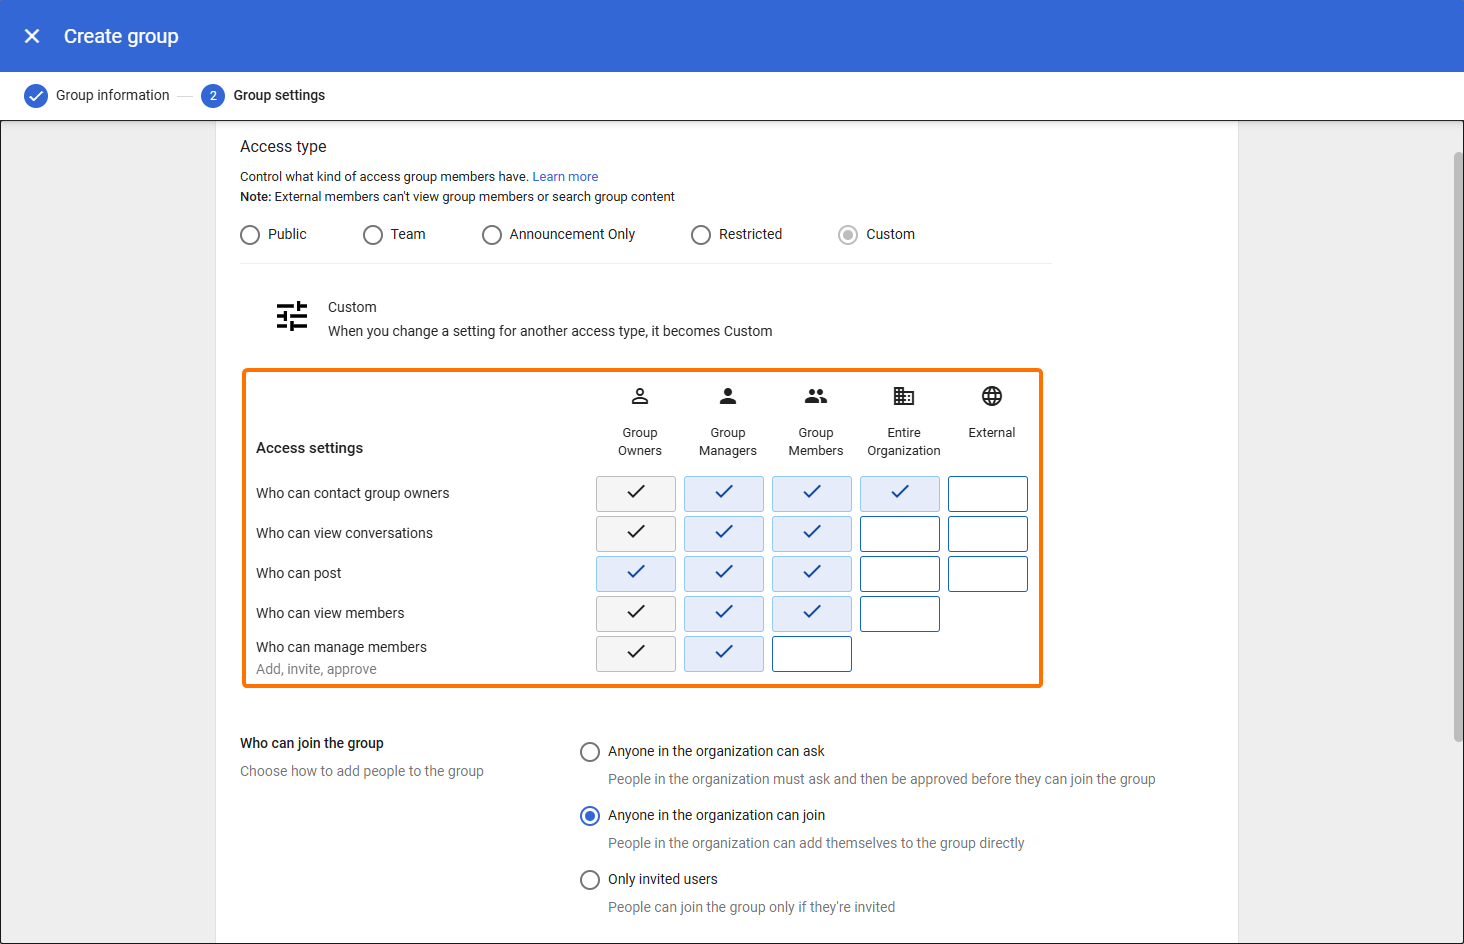
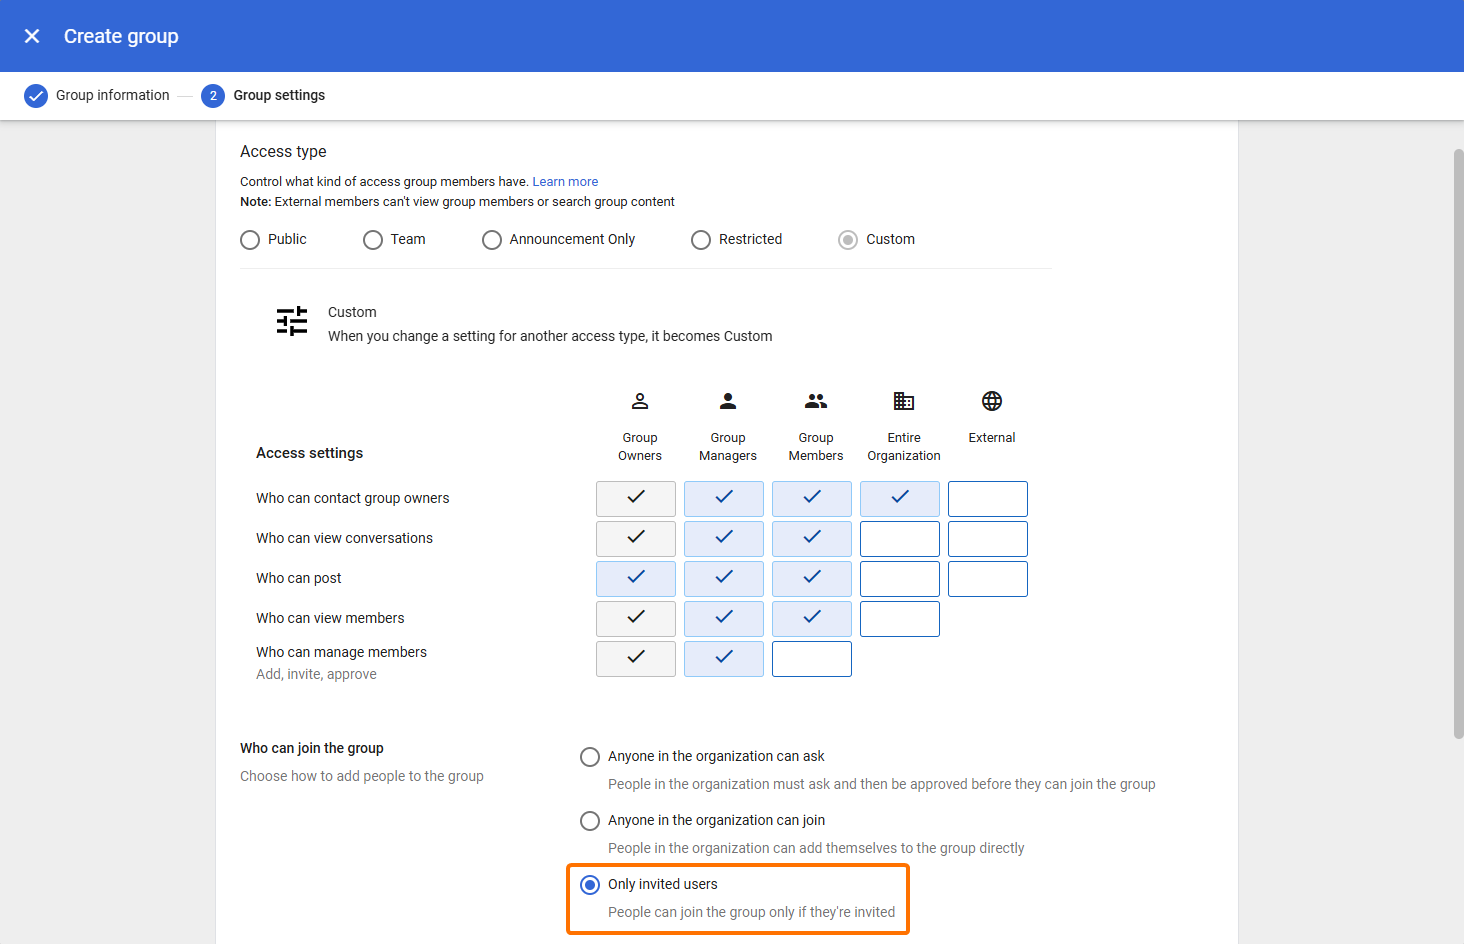
Create another group named CrosswareMailSignatureAdmins.
-
Assign an email address.
-
Add a description.
-
Set an owner (preferably a Super Admin).
-
Tick Security as Group label.
-
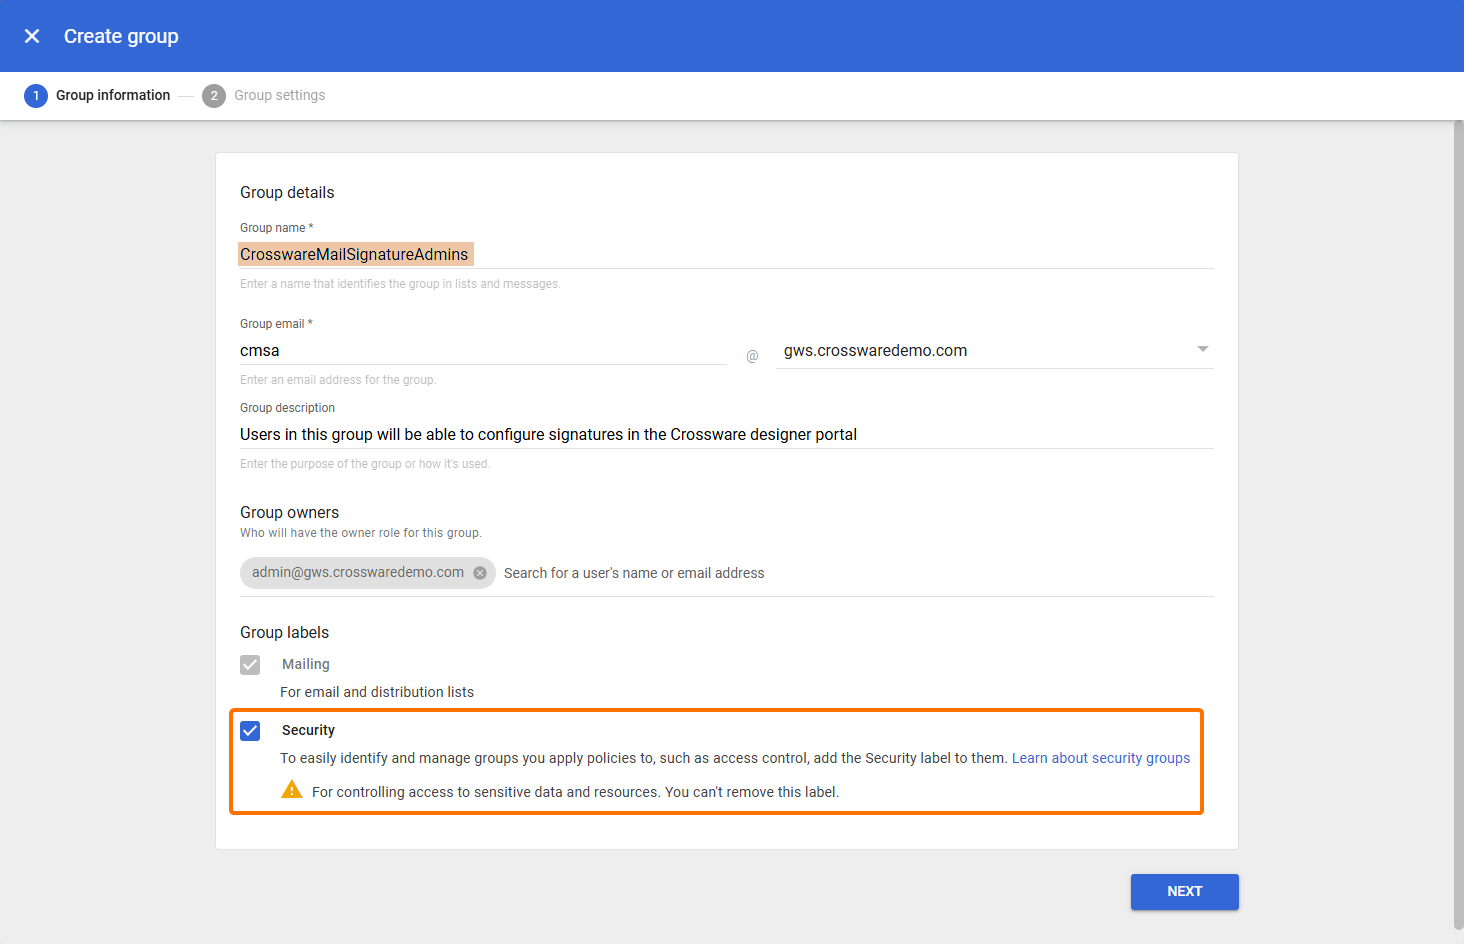
-
Select Only invited users.
-
Click CREATE GROUP.
Configure Routing Host
-
Go to Apps → Google Workspace → Gmail → Hosts.
-
Click Add Route.
-
Enter the following:
-
Host name: CrosswareOutboundHost
-
On the host name text field → Enter the smart host relevant to your region:
Australia: gwstrafficsmtp-aus-k1.crossware.co.nz
Canada: gwstrafficsmtp-can-k1.crossware.co.nz
United States: gwstrafficsmtp-us-k1.crossware.co.nz
France: gwstrafficsmtp-france.crossware.co.nz
Europe: gwstrafficsmtp-eu-k2.crossware.co.nz
United Arab Emirates: gwstrafficsmtp-uae-k1.crossware.co.nz
-
Port: 25
-
Tick Perform MX lookup on host
-
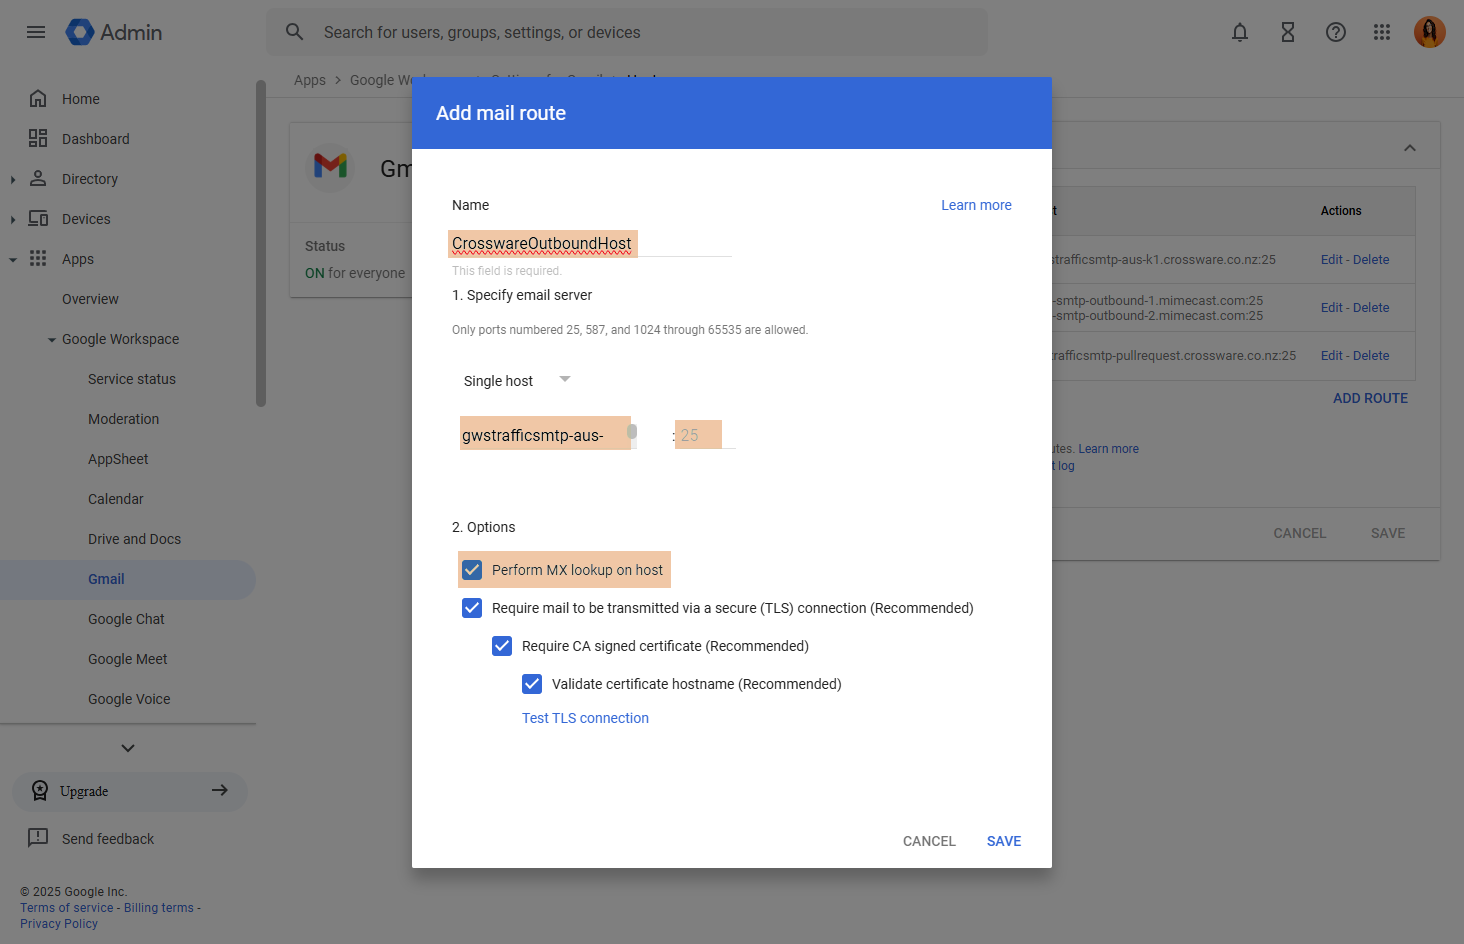
-
Save your changes.
Configure Inbound Connector (SMTP Relay)
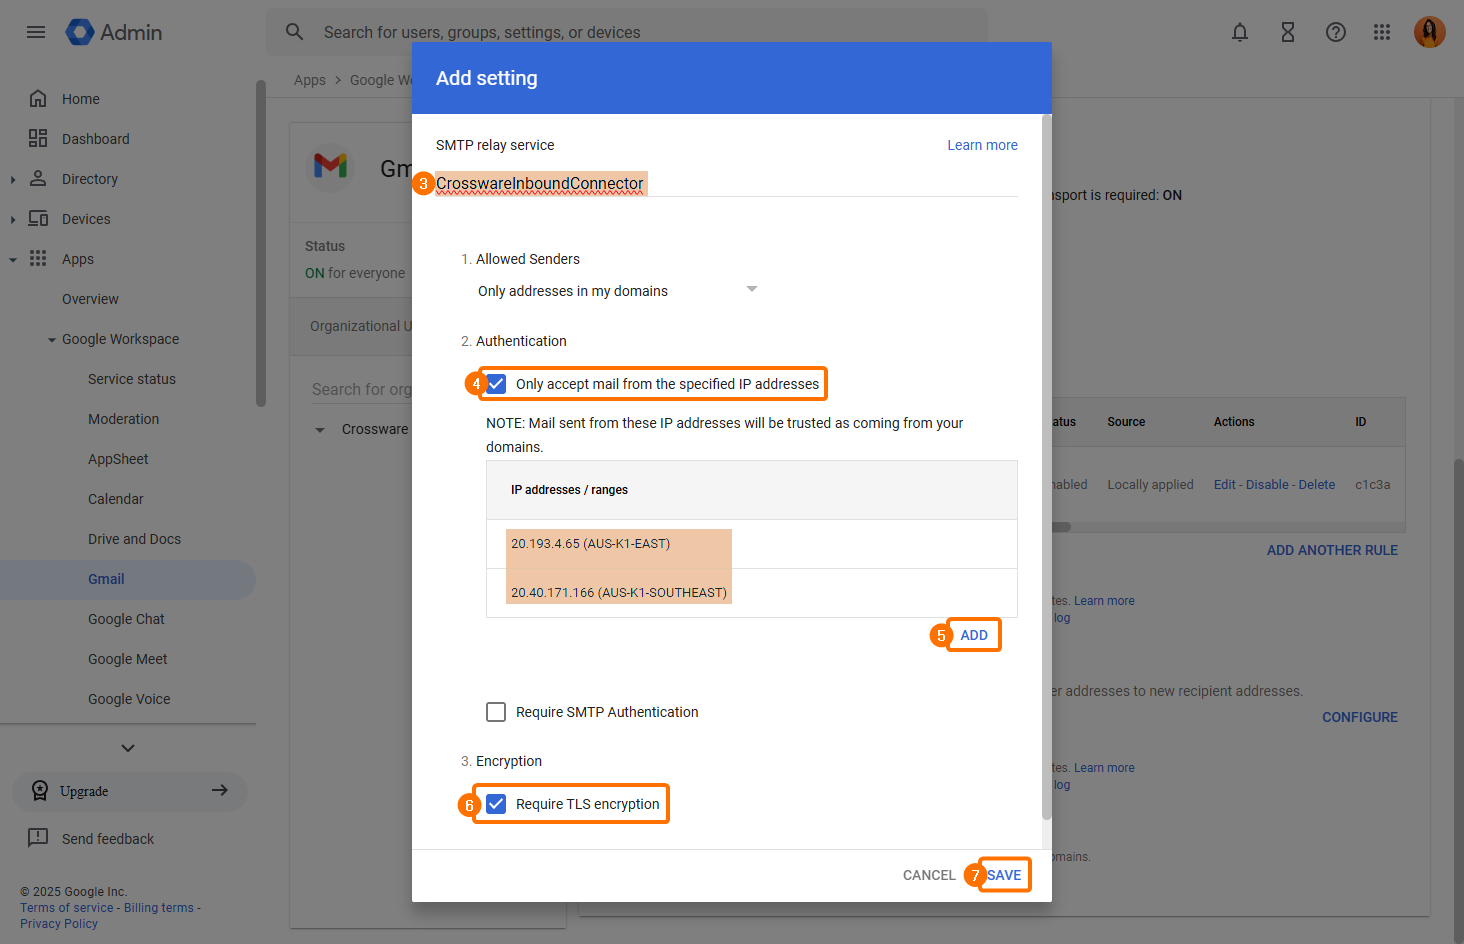
-
Navigate to Apps → Google Workspace → Gmail → Routing.
-
In SMTP Relay Service, click Configure.
-
Name the connector CrosswareInboundConnector.
-
Select Only accept mail from the specified IP addresses
-
Add the IP addresses provided for your region.
You will need to add both IPs for your region.
|
Region |
IP Address |
|---|---|
|
AUS-K1-EAST |
20.193.4.65 |
|
AUS-K1-SOUTHEAST |
20.40.171.166 |
|
CAN-K1-CENTRAL |
20.116.146.80 |
|
CAN-K1-EAST |
52.229.72.77 |
|
US-K1-EAST |
52.190.40.209 |
|
US-K1-WEST |
20.184.240.123 |
|
FRANCEProd-CENTRAL |
51.138.217.108 |
|
FRANCEProd-SOUT |
52.136.153.121 |
|
EU-K2-NORTH |
20.105.73.92 |
|
EU-K2-WEST |
20.126.196.163 |
|
UAE-K1-NORTH1 |
40.123.229.48 |
|
UAE-K1-NORTH2 |
20.203.119.149 |
|
QAT-K1-CENTRAL1 |
20.21.234.240 |
|
QAT-K1-CENTRAL2 |
20.21.224.39 |
|
IND-K1-CENTRAL |
135.235.229.184 |
-
Select Require TLS encryption.
-
Save your changes.
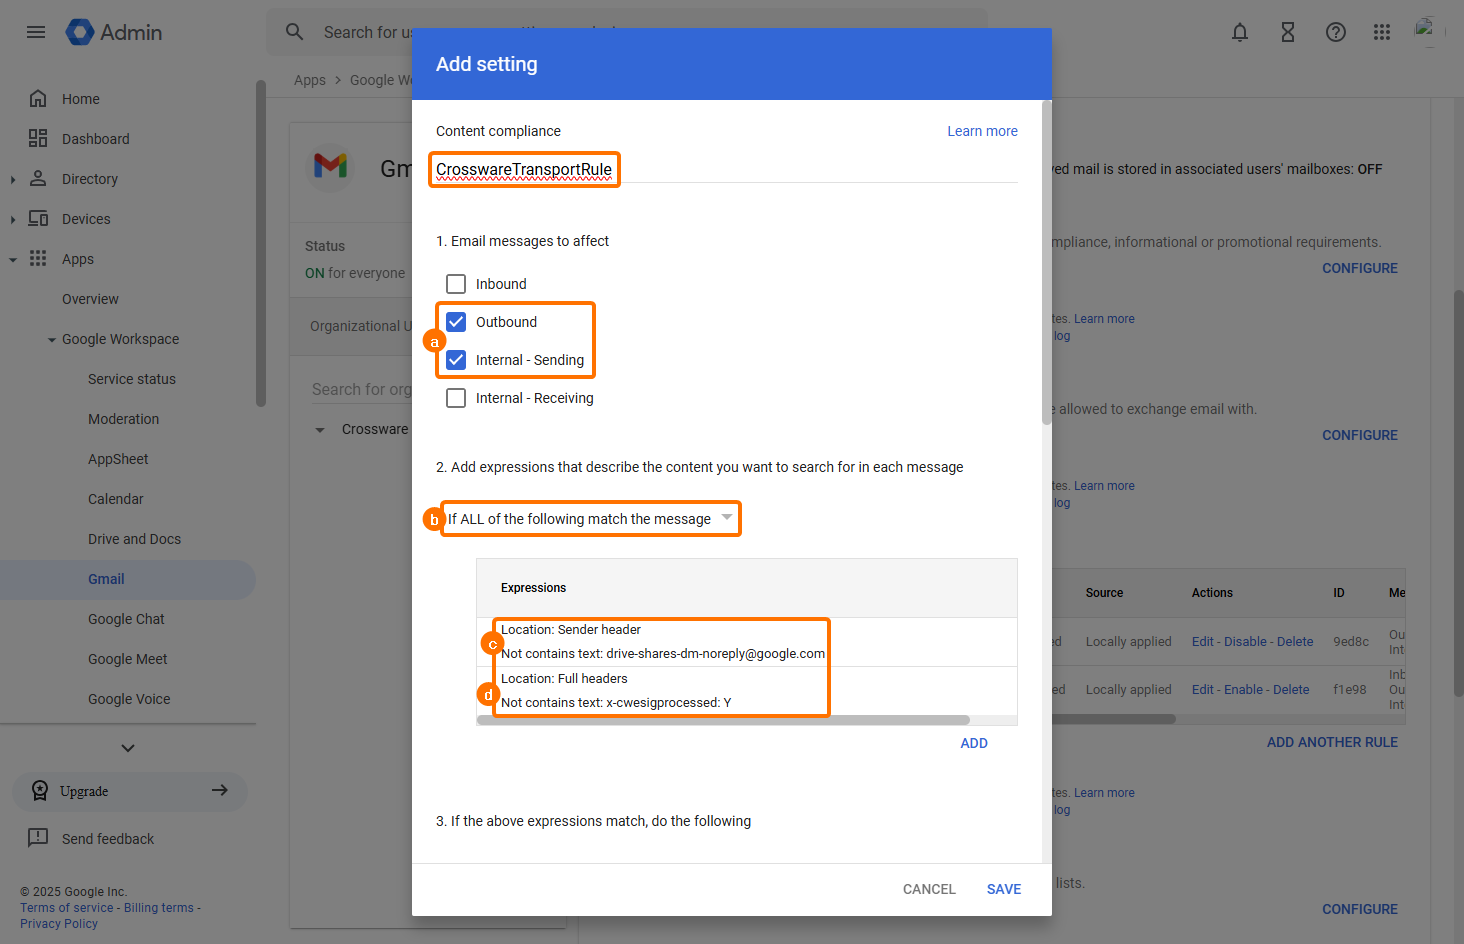
Create Outbound Transport Rule
-
Navigate to Apps → Google Workspace → Gmail → Compliance → Content Compliance, click Configure.
-
Create a new rule named CrosswareTransportRule.
-
Define the Rule Scope and Criteria:
-
Email messages to affect: select Outbound and Internal - Sending.
-
Select If ALL of the following match the message.
-
Expressions: Advanced content match → Full headers → Not contains text:
x-cwesigprocessed: Y -
Expressions: Sender header → Not contains text:
drive-shares-dm-noreply@google.com
-
-
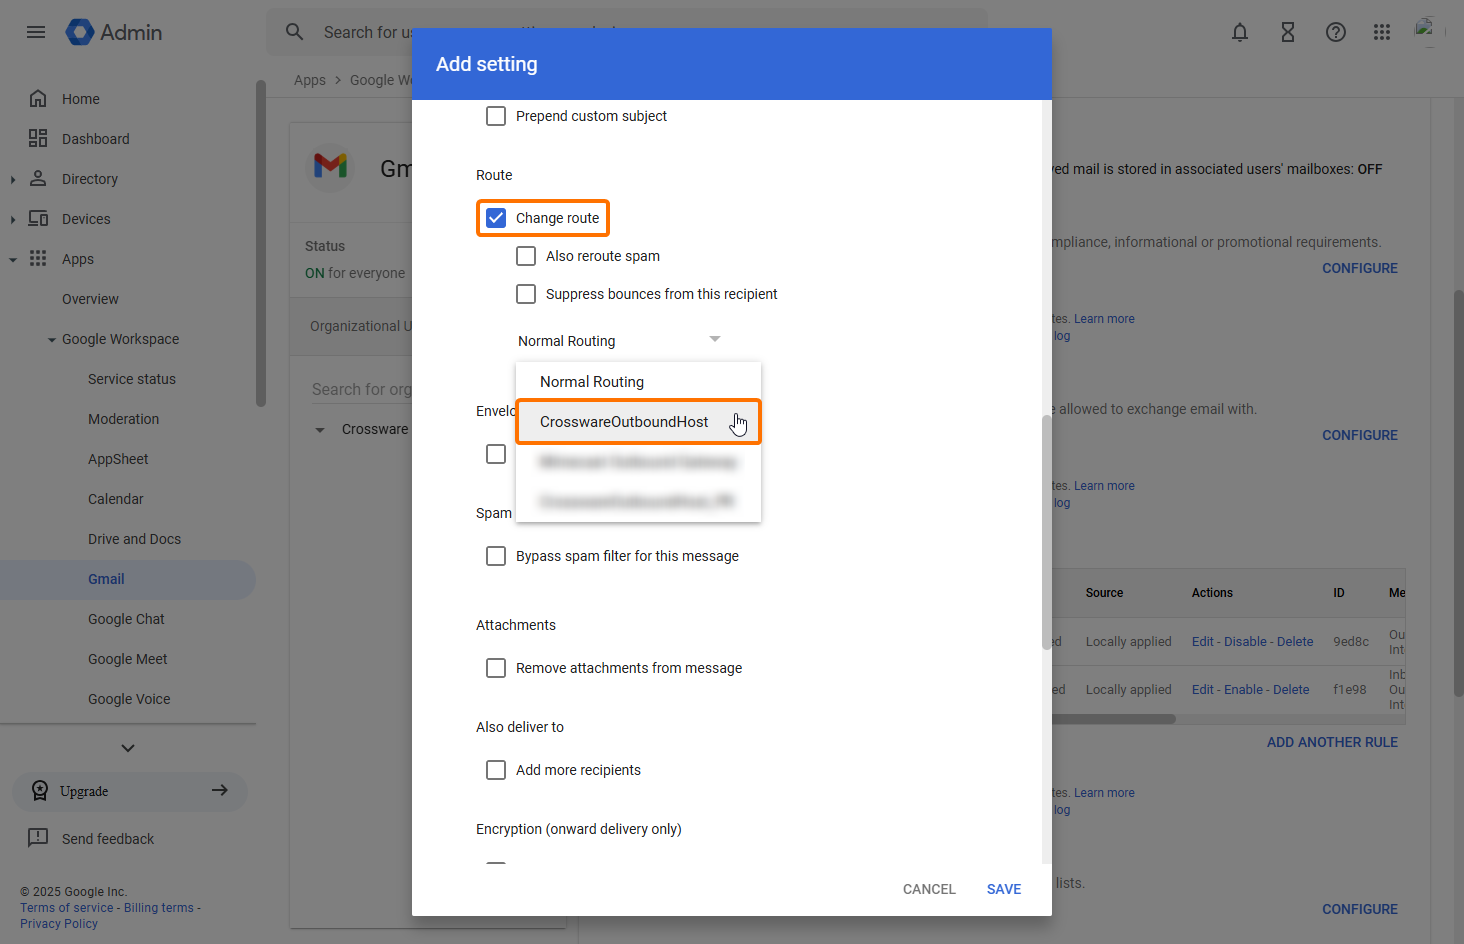
Under Route, choose Change the route → CrosswareOutboundHost.
-
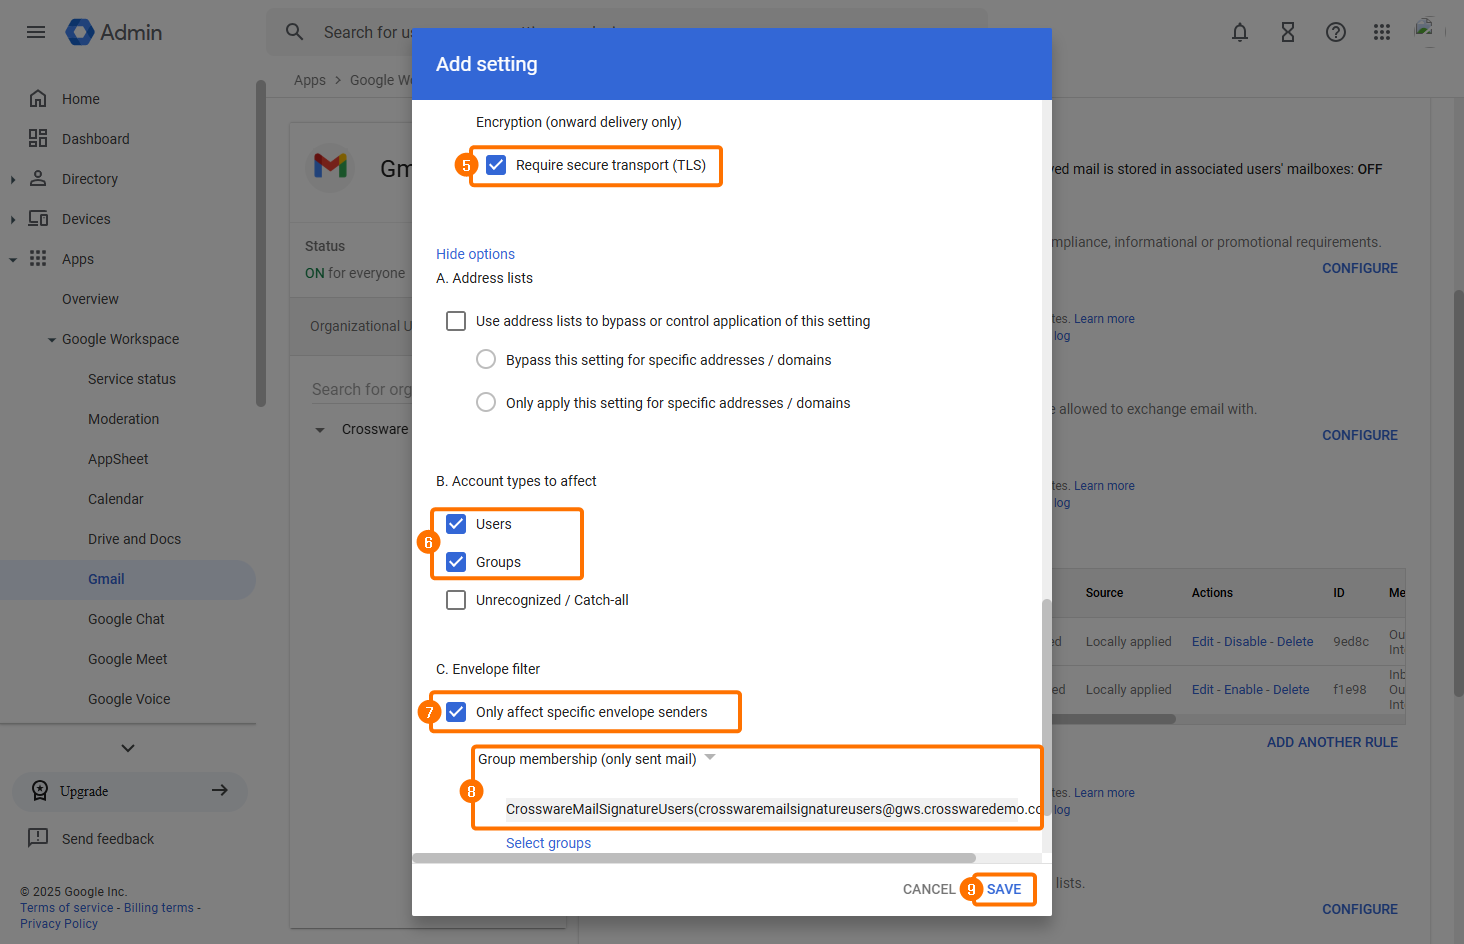
Enable Require secure transport (TLS).
-
In the Account types to affect section, select both Users and Groups.
-
In Envelope filter, select Only affect specific envelope senders.
-
Choose Group membership (only sent mail), then select CrosswareMailSignatureUsers.
-
Save your changes.
Completion
Once the above steps are completed, log in to the Crossware Email Signature Portal to design and manage your signatures.